Disclosure: This post may contain affiliate links. As an Amazon Associate I earn from qualifying purchases.
The Trek Marlin 4 is a good entry-level bike. There’s no doubt about that. But some of its stock components won’t perform well on trails.
Like, the bike doesn’t come with rebound damping. So, when the spring compresses, it will shoot back, and the rebound will be uncontrolled.
Besides that, its pedals tend to slip a bit more when they get wet.
And as mountain bikers, we often find that our pedals get wet while riding, which can be annoying.
So, if you have a Trek Marlin 4, I’ll talk about the upgrades you should make to improve its performance.
Figure Out Which Generation Marlin 4 You Have
| Components | Gen 1 (2018 to 2021) | Gen 2 (2022 to 2025) | Gen 3 (2026 onward) |
|---|---|---|---|
| Fork | SR Suntour M-3030, 75mm | SR Suntour XCE 28, 100mm | SR Suntour XCE 28, 100mm |
| Brakes | Tektro M280 mechanical | Tektro MD-M280 mechanical | Tektro HD-M275 hydraulic |
| Drivetrain | 3×7 Shimano Tourney | 3×7 or 2×7 Shimano | 1×8 Shimano ESSA |
| Rear hub | Freewheel | Freewheel | Shimano freehub |
| Shifters | Separate | EF500 combined brake and shift | Separate MT315 |
The two best fork upgrades for the Trek Marlin 4
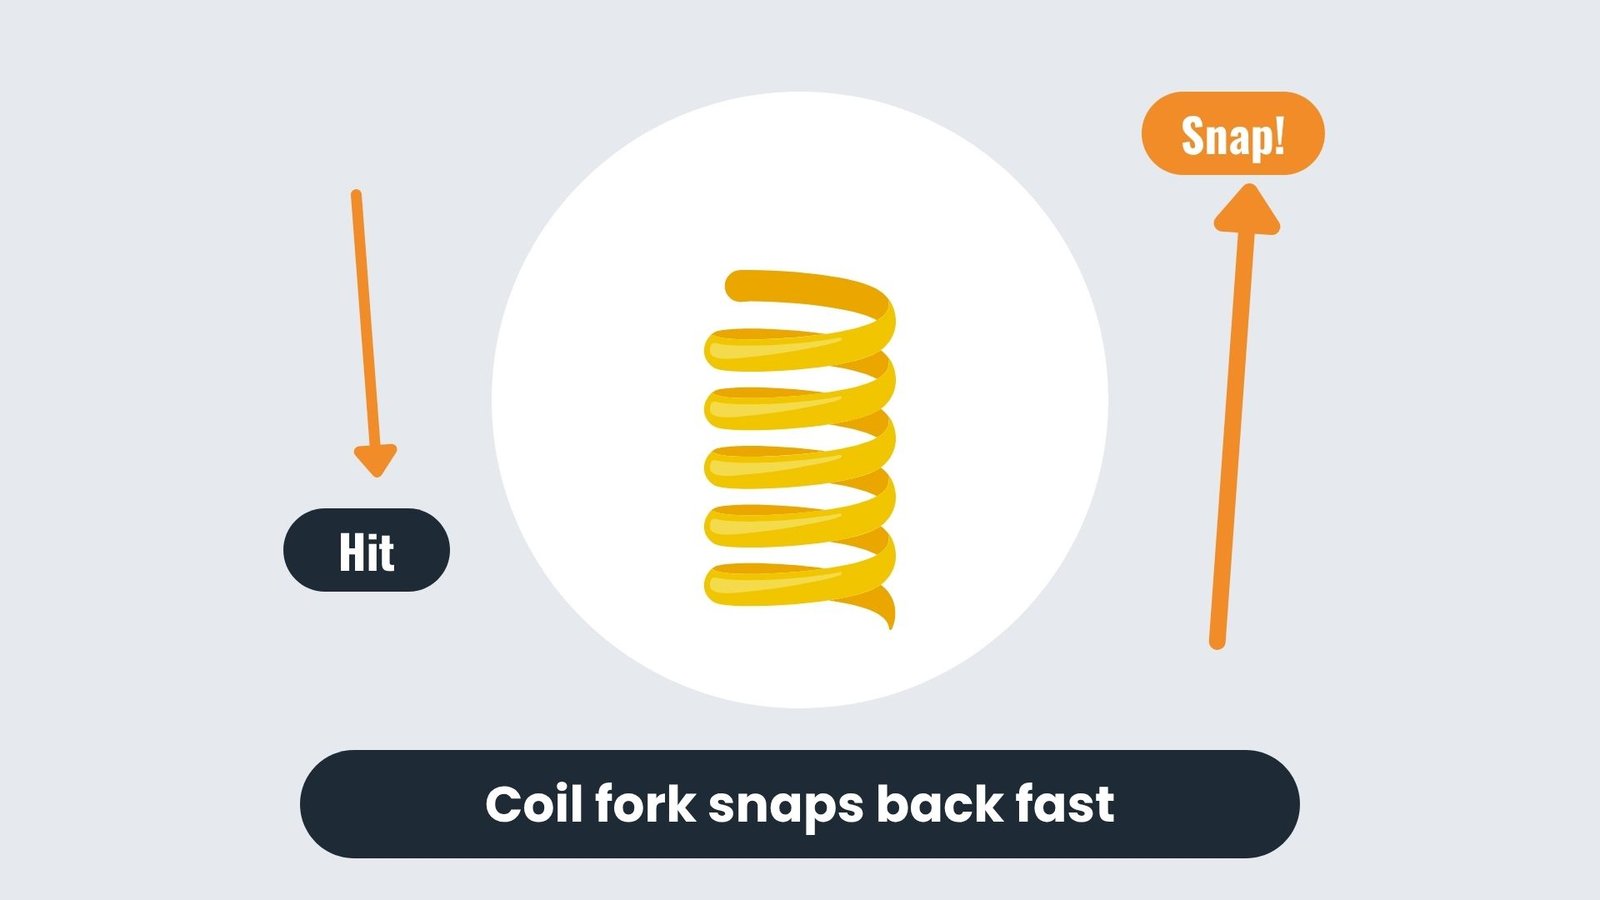
The Marlin 4 Generation 2 and Generation 3 come with the SR Suntour XCE 28, which is a coil fork, and the problem you’ll face is that when you compress the fork, let’s say on a rock, the coil spring inside will snap back as fast as it wants to, and you won’t be able to slow it down.
This is a big problem, and the impact will go straight to your arms because they’ll have to absorb that energy.
Besides this, the XCE 28 is very heavy. So, what should you do now? I would recommend replacing your fork.
And which fork do I think is most suitable for this bike? I recommend you go for the Manitou Markhor Straight QR-D 29 100mm fork. It’s a budget-friendly fork, yet better than what you got with the bike.
Manitou Markhor Straight QR-D 29 100mm Fork
Budget-friendly 29er fork, 100 mm travel, 9×100 quick release, straight steerer.
Here’s why I recommend:
- Air spring you tune to your weight: You can pump it with a shock pump until the sag gets suitable as per your body.
- 30mm stanchions: These are stiffer than the 28mm stock stanchions, so the fork will flex less when you’re braking hard.
- Rebound adjuster knob: You can control how fast the fork comes back after it compresses.
- Lockout lever: You can flip it before a climb so your pedaling energy isn’t getting absorbed by suspension, and you can flip it back before the descent.
- Straight steerer QR spec: This is the version that fits the Marlin 4’s straight head tube and 9x100mm axle.
The RockShox Judy Gold RL: Best Performance Fork for the Marlin 4
If you can spend a little more, the RockShox Judy Gold RL 29 100mm Straight 9×100 is a better fork, especially when you ride your bike only a few days a week.
It comes in two versions, straight steerer and tapered, but to upgrade Marlin 4, you should use the straight version. The MPN for the correct one is 00.402.055.018.
RockShox Judy Gold RL 29 100mm Straight Fork
Smoother damping for regular riders. Straight steerer, 9×100 mm, 51 mm offset.
What makes it better than the Markhor:
- Solo Air spring: RockShox’s sealed air design gives a more consistent feel from the first inch of travel to the last.
- Motion Control RL damper: On the Markhor, compression and rebound damping are linked. On the Judy Gold RL, you can adjust them separately. That means you can tune the fork to stay plush on small chatter while staying firmer under bigger hits.
- Lockout with blow-off: If you hit something big while the fork is locked, it will open temporarily to absorb the hit and protect the fork. But the Markhor’s lockout is simpler and won’t do this.
- Easy to service: RockShox parts and seals are available everywhere. If you’re riding regularly, you’ll want to service this fork once a season, and it’s simple to do.
| Feature | Manitou Markhor | RockShox Judy Gold RL |
|---|---|---|
| Spring | Air | Solo Air |
| Stanchions | 30mm | 30mm |
| Rebound damping | Adjustable | Motion Control RL (independent) |
| Lockout | Yes | Yes, with blow-off |
| Steerer | Straight 1-1/8″ | Straight 1-1/8″ |
| Axle | 9x100mm QR | 9x100mm QR |
| Price | Around $300 | $319 to $409 |
The Manitou Markhor 29 is a good choice if you want a big improvement without spending almost as much as your bike actually costs.
And the RockShox Judy Gold RL 29 is a better option if you want more adjustability and plan to keep riding the same bike for a longer time.
Both are a massive step up from the stock SR Suntour XCT 28. I recommend keeping the travel at 100 mm with either fork.
The Brakes on Gen 1 and Gen 2 Will Let You Down on a Wet Descent
If you have a Trek Marlin 4 Generation 3, it already comes with Tektro HD-M275 hydraulic disc brakes from the factory. So you can leave them as they are and move on to the next section.
But if you have Generation 1 or Generation 2, you’ll need to upgrade your brakes. That’s because these generations come with mechanical brake levers, which require you to pull a steel cable running through a housing. This housing stretches slightly under load and also flexes at every bend.
Because of these issues, along with a few others, your brakes require a long, hard pull before they bite. And when they do, you get very little feedback about how close you are to locking the wheel.
The brakes I’m recommending use hydraulic fluid, which doesn’t stretch or compress like a mechanical cable housing. As a result, every bit of force you apply to the lever goes directly to the caliper.
Shimano MT200: The Standard Brake Swap
The Shimano MT200 set (BL-MT200 levers and BR-MT200 calipers) is the most common and one of the best upgrades for the Trek Marlin 4.
Shimano MT200 Hydraulic Disc Brake Set (Front and Rear)
Complete set with levers, calipers and pre-bled hoses.
Here’s what the MT200 gives you:
- Two-piston calipers: Each caliper has two pistons that push the brake pads from both sides at the same time. Mechanical disc brakes usually move only one side. So when you have two pistons, they provide more even pad wear and better modulation.
- Reach adjustment on the lever: You can move the lever closer to or farther from the bar to match your finger length. So when the lever is exactly where your finger naturally rests, braking will become much less tiring on long descents.
- Tool-free contact point adjustment: This lets you set where in the lever stroke the brake starts to bite. Like the, some riders prefer light resistance before it grabs, and some want it to bite immediately. You can set this yourself.
- 1650mm rear hose included: The Marlin 4 uses internal cable routing and needs at least 1450mm for the rear. The JGbike MT200 set comes with a 1650mm rear hose, rotors, and adapters.
Btw, make sure the listing names Shimano explicitly and says BR-MT200.
One Thing Nobody Tells Gen 2 Owners Before They Buy the Brakes
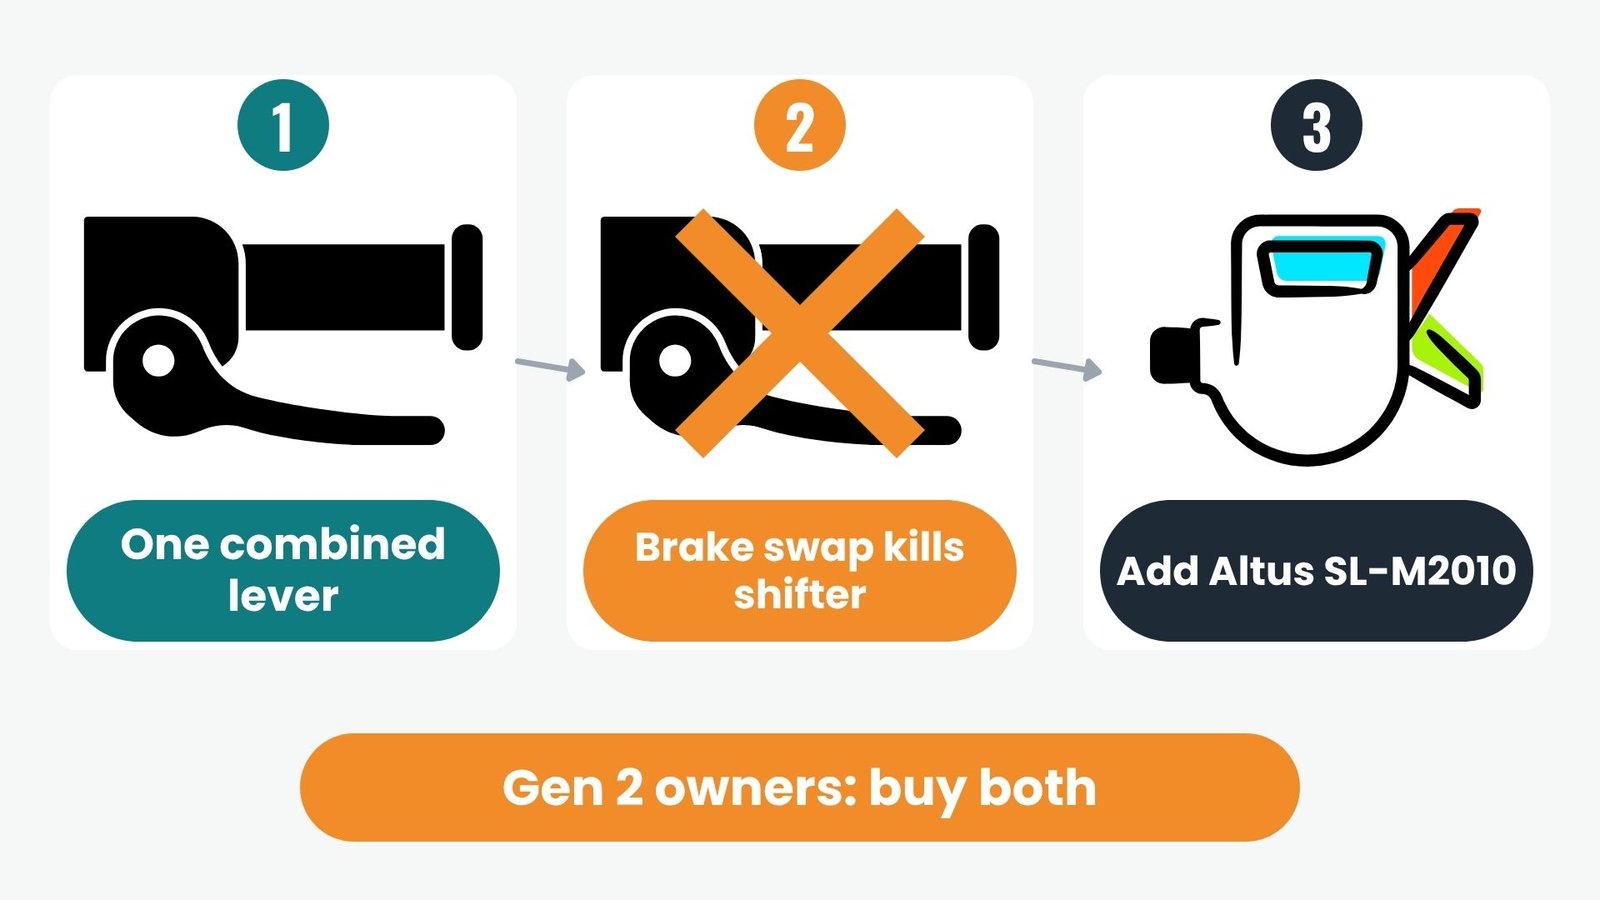
In Generation 2 of the Marlin 4, you get the Shimano EF500 combined brake and shift lever. The brake lever and gear shifter are a single unit. So, when you install hydraulic levers, the entire EF500 unit will have to be removed. And your shifter will go with it as well.
That’s why, if you only buy the brake set without planning it, your bike won’t shift after you install the new brakes.
Therefore, you need to buy a separate trigger shifter at the same time. You can get the Shimano Altus SL-M2010.
Shimano Altus SL-M2010 Trigger Shifter
Right-hand Rapidfire Plus trigger shifter, 9-speed.
If You Want More Stopping Power: Shimano Acera MT401/MT420
If your mountain bike is under a lot of stress because you ride on steep and long descents and use your brakes frequently, then the Shimano Acera MT401/MT420 setup is a good option for you.
This setup comes with a 4-piston caliper.
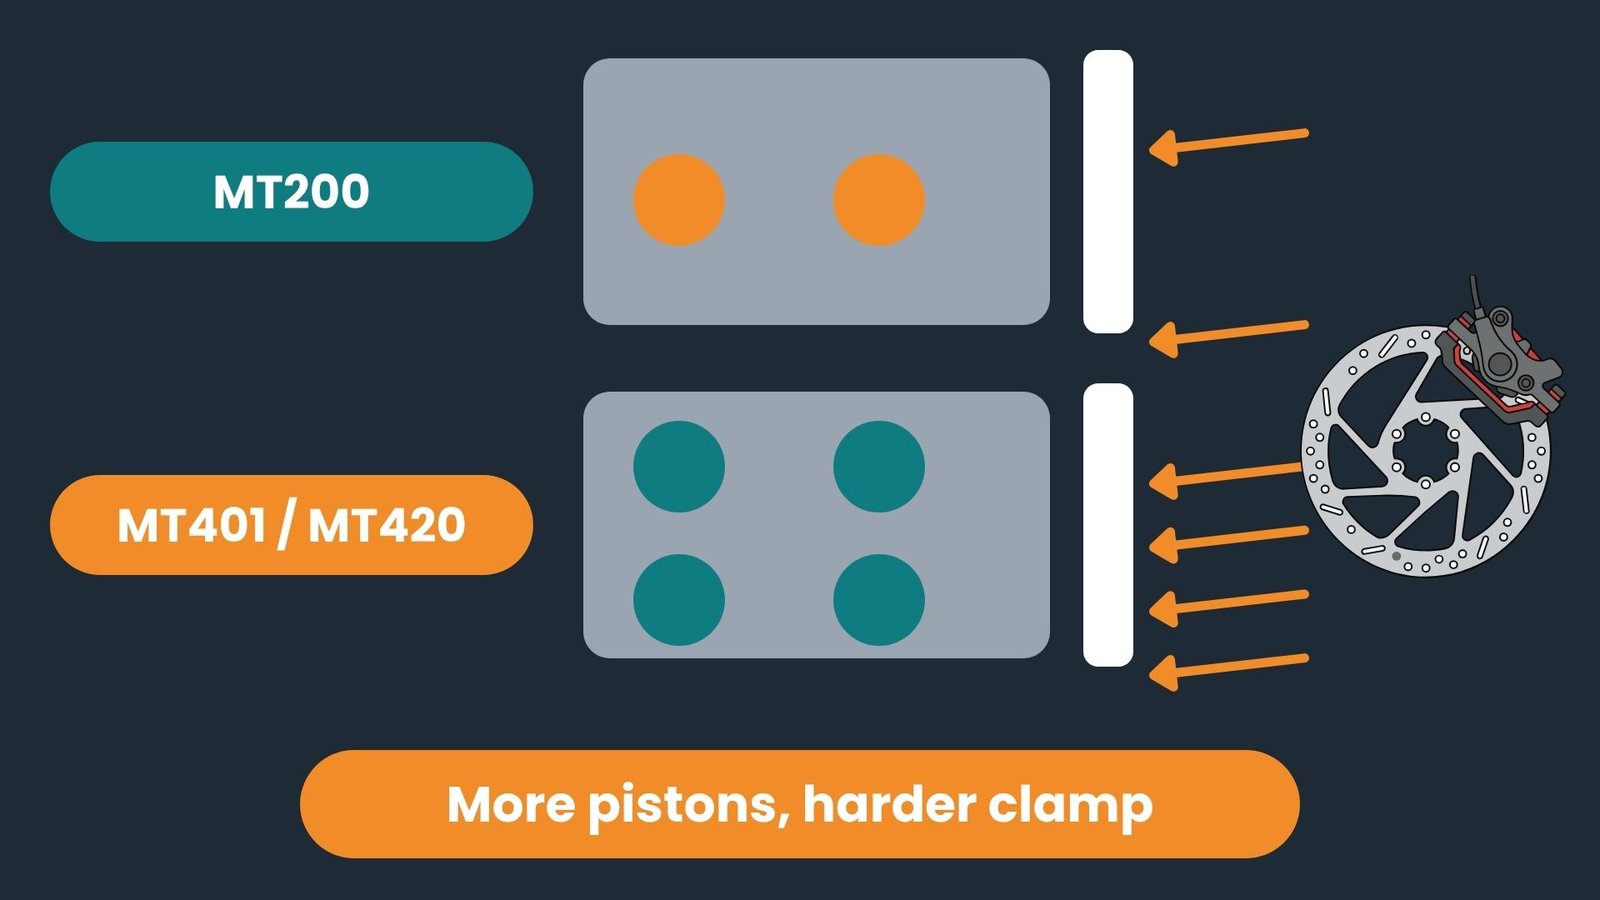
More pistons mean the caliper can clamp harder without requiring more lever pressure, which is important when your hands start getting tired during long descents.
Shimano Acera BL-MT401 / BR-MT420 Hydraulic Disc Brake
Four-piston caliper for stronger braking on long descents.
Pedals and Grips Upgrades for Trek Marlin 4
They are the cheapest upgrades on any Marlin 4 generation, and you’ll feel both of them on your very first ride after the swap.
The stock VP-536 nylon pedals on Gen 2 have a small platform and pins that wear smooth fast.
Gen 3 ships with unnamed nylon platforms.
When a plastic pedal loses grip on a wet root, your foot will slide off.
Metal pedals with hardened steel pins dig into the rubber sole of your boot and hold your foot in place, even on wet rock and mud.
What needs to be upgraded?
- So that your foot stays planted through corners, drops, and rough sections.
- You can also ride more confidently because you’re not spending any mental energy worrying about your foot slipping.
I recommend you go with the OneUp Components Aluminum Pedal. It’s the right choice for most riders:
OneUp Components Aluminum Pedals (Black)
Grippy, durable flat pedals with a good platform for most riders.
- 6061-T6 aluminum body: It won’t crack under hard landings the way nylon eventually will.
- 20 replaceable stainless steel pins: The pins are what grip your boot, when they wear down, you can replace just the pins, not the whole pedal, it’ll save you money on a long term.
- 4.4mm thin profile: A lower pedal is less likely to clip rocks and roots on technical sections, and you’ll get better feel for what the bike is doing underfoot.
- 100mm x 100mm platform: Big enough for stability on descents, still not so big that it gets in the way during climbs.
The DMR V8 Classic has a slightly larger platform if you have bigger feet or want more surface area underfoot:
DMR V8 Classic Flat Pedals
Slightly larger platform for bigger feet or extra surface under your shoe.
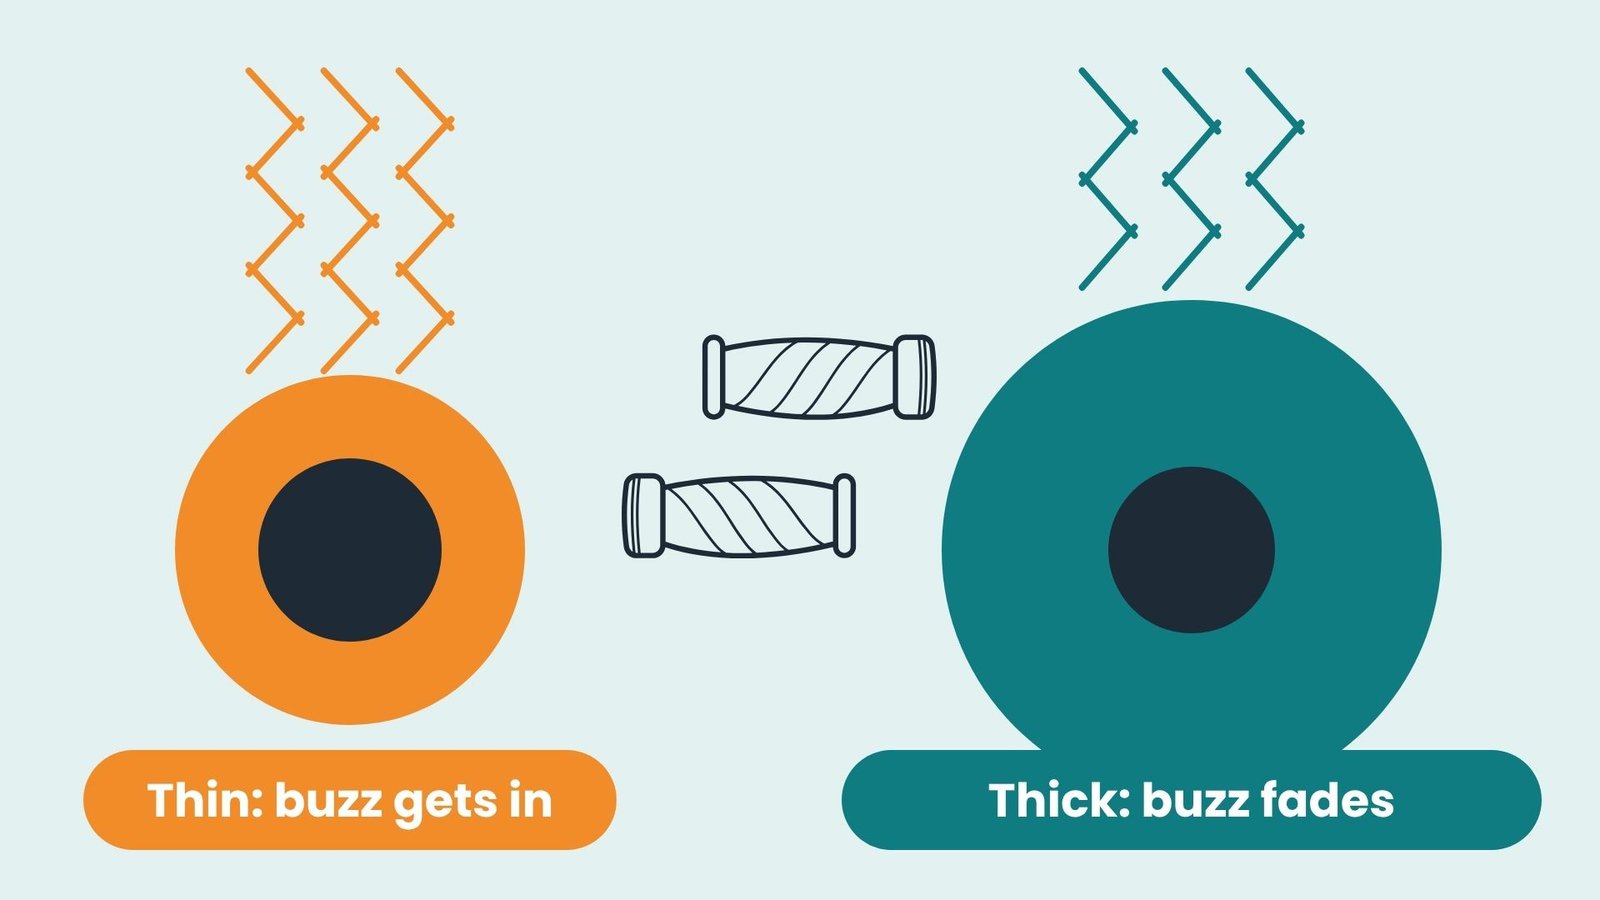
Regardless of which generation of the Marlin 4 you have, all of them come with thin stock grips.
They’re thin and firm, and on rough and uneven terrain, you’ll feel vibrations in your palms while riding. After some time, you may even start feeling a little pain.
To get rid of this issue, you can use ODI Elite Pro grips. They’re soft and thicker, and they’ll also absorb vibrations.
ODI Elite Pro Lock-On Grips (Black, 130 mm)
Soft, thicker grips that absorb vibration and ease hand fatigue.
- Softer compound than stock: Absorbs trail vibration before it gets to your hands, which means less hand fatigue on longer rides.
- Lock-on clamps on both ends: The grip won’t slide or twist no matter how hard you hold on.
- 130mm standard length: Fits the bars without interfering with your brake levers or shifters.
You can buy the pedals and grips together.
Upgrade the tires on your Marlin 4
In Generation 2 of the Marlin 4, you get 29×2.20 inch front and rear tires. That’s a narrow contact patch. So, on loose dirt, wet trails or wet rocks, these narrow tires won’t provide enough rubber contact with the ground, which means they won’t perform very well.
If you have Generation 3, it comes with Bontrager Montrose Comp tires of a similar width. But if you go for wider tires, like 2.35 to 2.40 inches, you’ll have more rubber in contact with the ground. This will make it easier to get better grip and ride more confidently.
So, I have a recommendation. If you like it, you can go with these tires.
What you’ll get after upgrading:
- Better traction in corners
- A more planted feel on technical sections
- A bike that doesn’t slide out as easily on loose or wet ground
Two tires that work well on the Marlin 4:
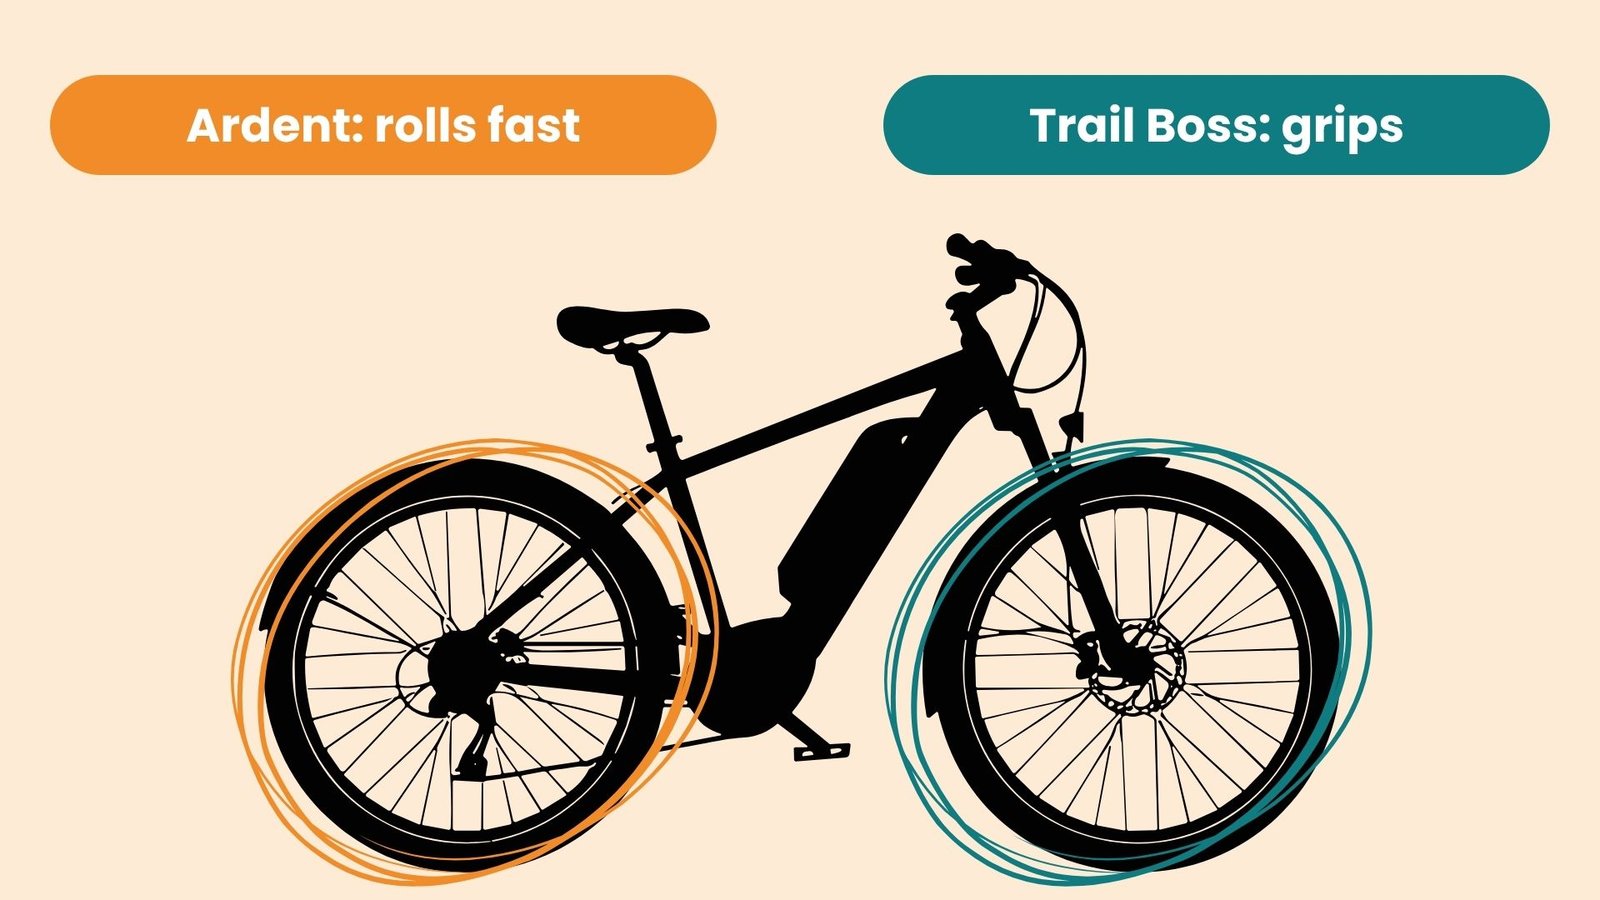
WTB Trail Boss 29×2.4 is a popular trail tire with a blocky center tread. It rolls well, and it has aggressive side knobs that grip in corners.
WTB Trail Boss 29×2.4 Tire
Blocky center tread with aggressive side knobs for cornering grip.
Maxxis Ardent 29×2.4 is faster rolling with a less aggressive tread, which is better if your trails are mostly hardpack.
Maxxis Ardent 29×2.4 Wire Bead Tire
Faster rolling, less aggressive tread. Great for hardpack trails.
One good combination that I really like is a Trail Boss up front and Ardent at the rear. This is because you’ll use the front tire for cornering grip, while the rear tire will help you roll faster, as it handles more braking and propulsion load.
However, if you want to go tubeless, the stock connection rims on Gen 2 and Gen 3 aren’t tubeless-compatible. So, if you want to switch to a tubeless setup, you’ll have to buy new wheels.
Drivetrain Upgrades: Worth It on Gen 3, Not on Gen 1 or Gen 2
Marlin 4 owners often waste the most money when upgrading their drivetrain.
For Generation 1 and Generation 2, you don’t even need to think about a drivetrain upgrade because they have a freewheel hub at the rear, and a standard mountain bike cassette won’t fit. So, to convert either of these bikes to a 1x drivetrain, you’ll need to replace either the wheel or the hub itself, which will cost you more than $100.
However, if you have Generation 3, it comes with a Shimano HG freehub at the rear, which will accept standard 8, 9, and 10-speed cassettes. The stock 1x drivetrain will work, but the gear range is limited, and the shifting quality under load is mediocre.
So, if you upgrade to a Shimano Deore 11-speed drivetrain, it will give you a wider climbing range and cleaner shifting for around $100.
What you’ll get on Gen 3:
- Smooth shifting even while pedaling hard
- A wider cassette range for steep climbs
- A drivetrain that can handle regular riding without skipping gears
For the Gen 3 Deore 11-speed upgrade, you need four parts:
- Shimano Deore RD-M5100-SGS rear derailleur — long cage, built for 11-speed with up to a 51T large cog
Shimano Deore RD-M5100-SGS Rear Derailleur
Long cage, 11-speed, handles up to a 51T cog.
- Shimano Deore SL-M5100 right shifter — 11-speed Rapidfire Plus trigger
Shimano Deore SL-M5100 11-Speed Shifter
Right-hand 11-speed Rapidfire Plus trigger shifter.
- Shimano CS-M5100 11-51T cassette — the wide 51T large cog is what gives you the climbing range
Shimano CS-M5100 11-51T Cassette
Wide 51T largest cog for real climbing range.
- An 11-speed chain — KMC X11 or Shimano CN-HG601 both work fine here
KMC X11 11-Speed Chain
High-performance 11-speed chain, 118 links.
One thing I would recommend avoiding is the MicroSHIFT Advent X 1×10-speed MTB groupset kit. It’s built for drop-bar gravel bikes, so it won’t work on a flat-bar mountain bike.
If you want Advent X components, you should buy the flat-bar trigger shifter and the Advent X rear derailleur.
Upgrade Saddle Only If It’s Causing Discomfort
The saddle isn’t as important as other components on the bike, like the fork, suspension, chain, tires, etc. So, if you’re comfortable with your current saddle, I would recommend not changing it at all.
The Generation 3 Marlin 4 comes with a Bontrager Versa saddle, which most bikers seem to like. I’ve seen a lot of good reviews about it.
But if you feel discomfort or some numbness during longer rides, like 50 minutes to an hour, then you can compare different mountain bike saddles. I would recommend going with the WTB Volt saddle.
WTB Volt Trail Saddle (Medium, Steel Rails)
Comfortable medium-padding saddle for longer rides.
Here’s what it actually does differently:
- Center relief channel: There’s a groove running down the middle of the saddle. It removes direct pressure from the perineal area, which is the main cause of numbness on longer rides. The stock Bontrager Verse Short doesn’t have this.
- Two width options: The Volt comes in 27.5mm (Slim) and 30mm. Saddle width should roughly match your sit bone width. Most trail riders do fine on the 30mm, but having the option matters if you’ve always found saddles too narrow or too wide.
- Slightly curved profile: It supports a forward lean on descents and a more upright position on climbs without feeling like you’re sitting on a hard flat shelf.
- Chromoly rails: These hold their shape under real trail use without adding a lot of weight.
If the stock saddle isn’t causing you problems, don’t touch it. Do the fork, brakes, and pedals first. The saddle is the last thing to change.
When the Upgrade Math Stops Working in Your Favor
I’ve talked about the best upgrades for the Trek Marlin 4. If we calculate the total cost of all these upgrades, it will come to around $400. The actual amount may vary a little, but I’m giving you a rough estimate.
So, my opinion is that if you’re planning to change your bike, don’t spend money on all these upgrades. Instead, you can move to another bike, like the Trek Marlin 7.
You’ll already get many of these things with it, like a RockShox Judy fork, MT200 brakes, better tires, and many other components.
But if you like your current Marlin 4, then that’s fine. You can upgrade all these components or just the ones you actually need. If I were in your place, I wouldn’t upgrade things like the saddle or brakes.
But the other components we discussed, especially the bike’s fork, are upgrades I wouldn’t have any problem spending money on.
Questions About Trek Marlin 4 Upgrades
What fork fits the Trek Marlin 4?
The Trek Marlin 4, across almost all its generations, comes with a straight 1-1/8 inch steerer and a 9x100mm quick-release front axle. So, you need a straight steerer QR fork.
Two options you can consider are the Manitou Markhor Straight QR-D 29 100mm, and the the RockShox Judy Gold RL 29 100mm Straight 9×100 (MPN 00.4020.556.018).
By the way, remember that the Judy also comes in a tapered version. So, you need to make sure that the listing you’re buying from specifically mentions that it’s the straight steerer version.
Does the Trek Marlin 4 have a tapered or straight head tube?
You will find straight 1-1/8 inch on every gen of Marlin 4. This is one of the main hardware differences between the Marlin 4 and the Marlin 5 and above.
Higher Marlin models have a tapered head tube that opens up far more fork options, but on the Marlin 4, you’re limited to straight-steerer forks.
Can you put hydraulic brakes on a Trek Marlin 4?
Yes, absolutely. You can use hydraulic brakes on any generation of the Trek Marlin 4. The frame has standard post-mount disc brake mounts, which means it can accommodate hydraulic calipers on Generation 1 and Generation 2.
You can use Shimano MT200 brakes. If you have Generation 2, you will also need to buy a separate trigger shifter because the EF500 combined shifter unit comes off along with the brake lever.
And if you have Generation 3, good for you. It already comes with hydraulic brakes from the factory, so you don’t need to upgrade them.
Is the Trek Marlin 4 tubeless-ready?
Actually, no. The Marlin 4, from Generation 1 to Generation 3, comes with Schrader valve holes that are not listed as tubeless-compatible by Trek.
So, if you want to switch to a tubeless setup, you’ll need new rims. Simply replacing the valves and sealant won’t be enough.
What are the best upgrades for the Trek Marlin 4 Gen 3?
In the Marlin 4 Generation 3, you already get hydraulic brakes, so you don’t need to upgrade them. You can upgrade the pedals, grips, tires and fork.
And in Generation 3, you also get a Shimano freehub, so you can even upgrade to a Deore 11-speed drivetrain. After that, you can focus on the handlebars, suspension, and contact points.
Can the Trek Marlin 4 take a dropper post?
If you have a Generation 3 Trek Marlin 4, then yes, because the frame has internal dropper post routing and a 31.6 mm seat tube.
But if you have Generation 1 or Generation 2, you can still use a dropper post with external cable routing. It will work, but the setup won’t look as clean.
Is the Trek Marlin 4 worth upgrading or should you just buy a better bike?
If you already have a Marlin 4 and don’t want to sell it yet, you can upgrade its fork. It’s definitely worth it. It will change how your bike rides more than any other single component.
But if your budget allows you to spend a little more, and you want to stay with the Marlin lineup, then you can go with the Marlin 7