Disclosure: This post may contain affiliate links. As an Amazon Associate I earn from qualifying purchases.
Most mountain biking injuries trace back to a short list of things: no helmet or gloves, a bike nobody checked, trails above the rider’s skill, and riding alone with no plan. The tips below fix each of those, starting with the gear you should never skip.
How risky the sport really is depends on the trail, and we break that down in is mountain biking dangerous.
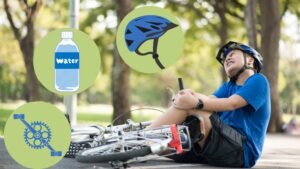
1. Wear a Proper Helmet
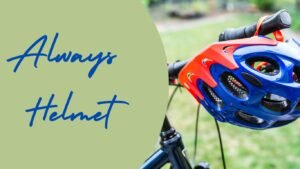
The helmet is the first and most crucial mountain biking gear that you want to wear to protect your head.
Helmets also need to meet safety standards. In the US, look for the CPSC sticker inside the helmet.
If you mostly ride downhill or in bike parks, a full-face helmet certified to ASTM F1952 gives you extra protection.
For regular trail riding, a convertible helmet with a removable chin bar is a flexible option. Replace any helmet after a hard crash, even if it looks fine.
Riding technical trails without a helmet is a bad bet, because one small mistake can end in a serious head injury.
Also read: How to choose the right mountain bike Helmet (Complete Guide)
2. Check Your Gear Before Riding
You want to do a little inspection before going on a ride.
For example, you can check your bike’s brake and tire pressure. If you are riding in muddy areas, then you can have a little less pressure for better control. (How to fix flat tires of your MTB)
Plus, you wanna check the chain and suspension, etc., to make sure that everything is working properly.
A pre-ride mountain bike check is very important to prevent accidents on the trail. You can also carry some other things like food with you.
However, many riders overlook this step, and they do not check the bike before going on a longer route.
I suggest you ride in a locality, like taking one round around the park or somewhere else, just to make sure everything is working properly.
Trust me, just a 5-10 minute pre-ride check can save you from a lot of trouble.
More importantly, don’t forget to test your bike’s pedals and handlebars as well.
3. Wear Appropriate Clothing
Now, you want to wear breathable, moisture-wicking fabrics. Padded shorts are good for more comfort.
Besides this, don’t forget to wear gloves as they will improve grip and also protect your hands if you fall or go through a dense forest where too many bushes will attack your hand.
Plus, you can wear bright-colored clothes to make yourself more visible to others on the trail. Glasses or goggles matter too, since dust, branches and flying rocks hit your eyes at speed.
Alongside that, you need to avoid wearing jeans and improper clothes for mountain biking because they will make you uncomfortable, plus they will also limit your range of motion.
You can also invest in buying dedicated clothes for mountain biking, like a waterproof jacket if you ride in rainy weather.
Although some trails are closed during the rainy season, you can ride on roads; in that situation, you will need rainy clothes like a jacket.
Also read: What to wear for Mountain biking? (Clothes guide for men, women and kids)
4. Carry a Repair Kit
On longer rides and bigger trails, always carry a repair kit.
A flat tire or loose chain will ruin your ride if you are unprepared, and that’s why it’s important to have a basic tool kit so that you can repair it midway.
You can carry a multi-tool, spare tube, tire levers, and, most importantly, a portable pump for air pressure.
I also advise you to learn some basics on how to repair a mountain bike like some normal skills.
You can practice some basic repairs at home before you hit the trail.
Pack a small first aid kit and your phone too, and tell someone which trail you are riding and when you expect to be back. Cell service drops out on many trails, so download an offline map first. For longer rides far from help, read our remote trail safety tips.
Halfway down a trail is a bad time to start googling how to fix a flat.
Also read: How to do Regular Maintenance of your Mountain bike
5. Stay Hydrated

Hydration is very important on longer rides. If you are not properly hydrated, you cannot cover longer routes. You will feel very tired. Your body will not stay active. Plus, you will not enjoy the ride as you should.
That’s why you need to drink enough water at home, plus carry a water bottle or a hydration pack.
During the ride, you can keep taking regular sips to stay energized depending on the weather conditions. In summer, you can take it more frequently than in winter.
Even if you don’t feel thirsty, you still need to keep taking some sips. Many riders make the mistake of waiting until they feel thirsty.
Besides this, you can also have electrolyte drinks, especially on hot days or for grueling trails.
Fuel matters as much as water: eat a meal rich in carbs before you head out, and carry a snack for longer rides, because getting tired is when most riders make mistakes.
6. Know the Trail
Before going on a trail, it is better to know that trail and understand whether its difficulty level matches your skill level or not.
Many accidents happen when you don’t know the trails and unexpectedly encounter some hard obstacles that you are not familiar with.
You can use trail maps and apps to plan your route.
Some trails are marked as “Expert,” which means they are for pro riders, not for intermediate and beginners.
Despite being a beginner, if you try to go on this trail, you may face some serious consequences if you are not lucky enough.
Some riders also assume that they can handle it, especially beginners, even if they are not prepared for the trail.
However, you can also study some online reviews and ask fellow riders about the trails if you do not see the marked Expert, Beginner, Intermediate, etc.
In the US, trails are usually rated green (easiest), blue (intermediate), black (difficult) and double black (expert only). Green trails have gentle slopes and smooth surfaces, so start there, and move up to blue once moderate climbs and descents feel comfortable.
Also read:
- How to find local MTB Trails near You
- Family Friendly trails you can visit
- 27 Best Trails in the USA a Biker can Visit
7. Ride Within Your Skill Level
It is good to push your limits, but it is not good to tackle trails beyond your skill level, which I also mentioned right before.
Because sometimes, overconfidence can lead to serious accidents.
You need to gradually build your skills and confidence before riding on some challenging routes.
Overconfidence is behind a lot of avoidable crashes.
So start on easy trails and move up gradually.
You can also join a local biking group because when you are riding in a group, there will be many intermediate and experienced riders who will share some valuable tips, which will be very helpful for you, especially when you are a beginner.
Also read: Essentials mountain biking skills every rider needs to learn
8. Use Proper Braking Techniques
You want to use proper braking techniques while avoiding slamming on the brakes because it will cause skidding and control loss.
So, practice on different trails to improve your skills.
For example, you can try gradual braking on gravel paths to control stops on steep slopes where you can understand how your bike responds and how you feel.
This simple skill will prevent you from many falls or accidents, especially on technical descents, and will also improve your confidence.
You can use both front and rear brakes and practice feathering them for smooth stops, especially on steep descents.
Also read: 4 Weeks Training Plan for Mountain Biker
9. Communicate with Other Riders
If you are riding in a mountain bikers group, keep a clear communication going on. It will help you prevent any collision.
You can use hand signals and call out obstacles, stops, or changes in direction to stay alert; this is as important as technical skills. That’s why you want to learn it.
You can announce your presence when you are overtaking any slower riders in your group.
Communication while riding will help you ride fast and enjoy the ride more.
Related: Mountain Biking Etiquettes Every Biker Should Know
10. Watch the Weather
Before going for a ride on your bike, make sure to check the weather forecast. Rain can make trails slippery and muddy, which might be difficult for beginners to control.
If the weather is really hot, you will need to carry some extra water bottles to avoid dehydration; you always want to stay prepared for sudden changes in weather.
Especially when you are riding in mountain regions, always carry an extra layer of clothes.
Besides this, you can get a lightweight rain jacket. Many times, trails seem very fine, but within one minute, they become completely changed, especially in the rainy season.
11. Be Aware of Wildlife
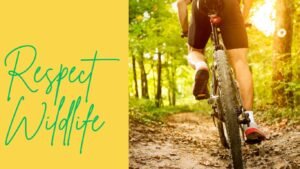
Many trails go through natural habitats, especially those in dense forests. So you want to respect wildlife.
For that, you can keep a safe distance and avoid sudden movements.
In bear country, carry bear spray where you can grab it quickly. Keep in mind that you are just a guest, and wild is their home.
So give them space.
Make some noise on blind corners so animals hear you coming. Surprising a bear is what causes problems.
Most importantly, always be prepared for unexpected encounters.
If you do meet a large animal, stay calm, back away slowly and give it room to leave.
12. Stay Visible
Make yourself easy to spot, especially when you are riding in low-light conditions.
You can have reflective gear like lights or even a simple bell that will make you visible to other hikers, riders, and even vehicles.
You can also consider investing in rechargeable bike lights as they are eco-friendly. If you ride at dawn or dusk, run a front and rear light even when it still looks bright.
Besides having lights, you can also have reflective patches on your clothing.
13. Learn How to Fall Safely

Many times, especially when you are a beginner, you may fall as everyone falls down, even some pro riders. So, you want to learn how to fall correctly to avoid injury.
For example, you can keep your body loose and aim to roll rather than press yourself with your hand.
And more importantly, don’t neglect wearing protective gear like knee pads, elbow pads, helmets, etc. Of course, a helmet is the first thing.
Trust me, when you practice falling on soft grass, it boosts your confidence. It also reduces your fear when you ride aggressively because you know the technique of falling and recovering quickly.
Related: Common Mountain Biking Injuries & How to Prevent Them
14. Know When to Stop
You need to stop when you see some signs like worsening weather, mechanical issues, and even sometimes if you feel unusual fatigue.
For example, if you see clouds turning a little darker or you hear unusual sounds from your bike, it means you should stop, find a safe place, or go back home.
Because if you ignore these signs, your fun ride can turn into a risky situation.
Final Thoughts
The trail will still be there tomorrow, so do not rush. If you are a beginner, give yourself time to build skills on easier trails first. Progress comes naturally with experience.
What is the most important piece of safety equipment for mountain biking?
All safety gears are important for mountain biking. But the helmet is the most important.
It protects your head from serious injuries whenever you fall. You can get a full-face helmet if you often ride on technical trails to minimize risk.
How can I prevent common mountain biking injuries?
There are many things that you can do to prevent injuries, such as ensuring that you have chosen the correct size bike and that you have a good setup, like adjusting the saddle height, handlebar position, brake lever reach, etc.
Plus, you want to make sure that you have developed some mountain biking skills.
You cannot jump directly into technical trails when you are a beginner. Pre-ride inspection is also important.
You can check everything on your bike, for example, mechanical issues like tires, brakes, chains, etc.
When you are riding on roads or in groups with your friends or other bikers, you want to stay focused and be aware of obstacles, and you can also have a conversation with your group members.
Most importantly, always carry a hydration pack and nutrition pack, especially when you are going on longer rides.
And you can have some snacks, even sandwiches. All these things are very important to enjoy a risk-free mountain bike.
What should I do if I crash on a mountain bike trail?
Whenever you fall or crash on a mountain bike trail, first get up and assess yourself for injury.
If you feel you are seriously hurt, like you are bleeding, then the first step is to call for help immediately.
Even if you feel okay, you can still check for any pain, swelling, etc. Besides this, if you have doubts, you can seek medical attention.
If everything is fine, you still want to check your bike and helmet to see if there is any damage before continuing your ride.
If the bike is damaged, don’t take the risk further. Walk it out and get it checked at a bike shop.
You can also report the incident to the trail manager or local authorities if you want, especially if you fall because of any mistake during the trail so that authorities can fix that mistake.

[…] trails that I have mentioned are also good for multi-day trips. Therefore, you need to know some extra safety tips for mountain biking in these […]
[…] Trail reviews are a valuable source for both discovering trails and ensuring your mountain bike safety. […]
[…] In this post, I have shared a pre-ride checklist to cover every trail. For the bigger picture, see our mountain biking safety tips. […]
[…] the saddle, handlebars, and pedals for more comfort. Budget for a helmet too, and read our mountain biking safety tips before your first trail […]