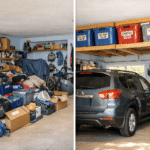
My aunt has a two-car garage. You would never know it by looking at it. In the beginning, it was one car, a pile of stuff on the other side, and a narrow path between them.
No overhead storage, real system, just stuff multiplying on the floor and along the walls like it had nowhere better to be.
So when her son (my cousin) asked my suggestions to help them figure out some cheap overhead garage storage ideas, I started looking at what was actually up there: open joists, decent ceiling height, and a whole lot of wasted space.
Here is what works for a real garage on a real budget. Most of these ideas cost between $10 and $60 and can be done in a weekend afternoon.
A few are under $5 dollars.
None of them requires you to tear into the ceiling or own a table saw.
Also read: 5 Quick and Cheap Garage Organizing Ideas That Actually Work
Start by Getting Stuff Off the Floor First

I know the post is about overhead and wall storage, but if you skip this step, you will just build a nice storage system around a pile of junk.
Before anything goes up, everything comes out.
My aunt and her kids spent about two hours pulling things out of her garage, and a third of it was left in garbage bags.
Once you see what you are actually working with, the storage problem gets a lot smaller.
A rough sort into three groups helps:
- Things you use at least twice a year (tools, seasonal gear, holiday decor)
- Things you use rarely but need to keep (spare parts, emergency supplies)
- Things you have been storing out of habit or guilt (donate or toss)
The first group goes on walls and accessible shelves.
The second group is your overhead storage candidate list.
The third group leaves.
What to Actually Put in Small Overhead Garage Storage (And What to Leave Out)
Overhead storage is not for everything. It is specifically good for things that are light enough to lift, do not need daily access, and will not get damaged by heat or humidity swings.
Garages get hot in summer; whatever goes up there needs to survive that.
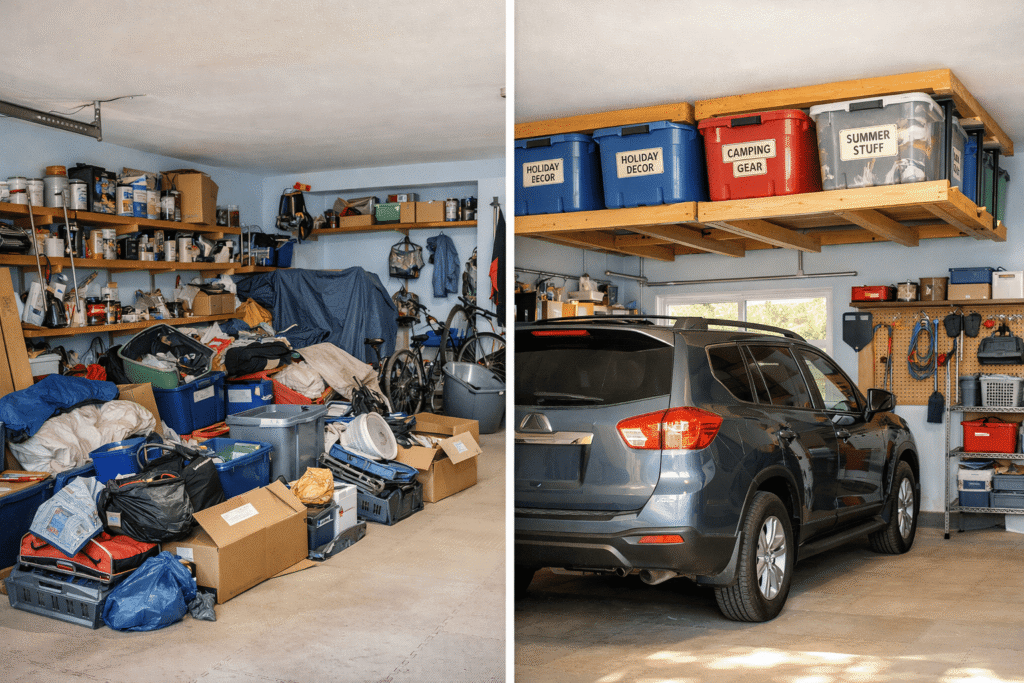
Good candidates for overhead storage:
- Holiday decor in sealed plastic bins (used once or twice a year, not heat-sensitive if packed in plastic)
- Off-season sports gear like sleds, boogie boards, and camping chairs
- Empty coolers and bins that take up floor space but weigh almost nothing
- Plastic storage totes with lids (the lid matters because dust and bugs are real)
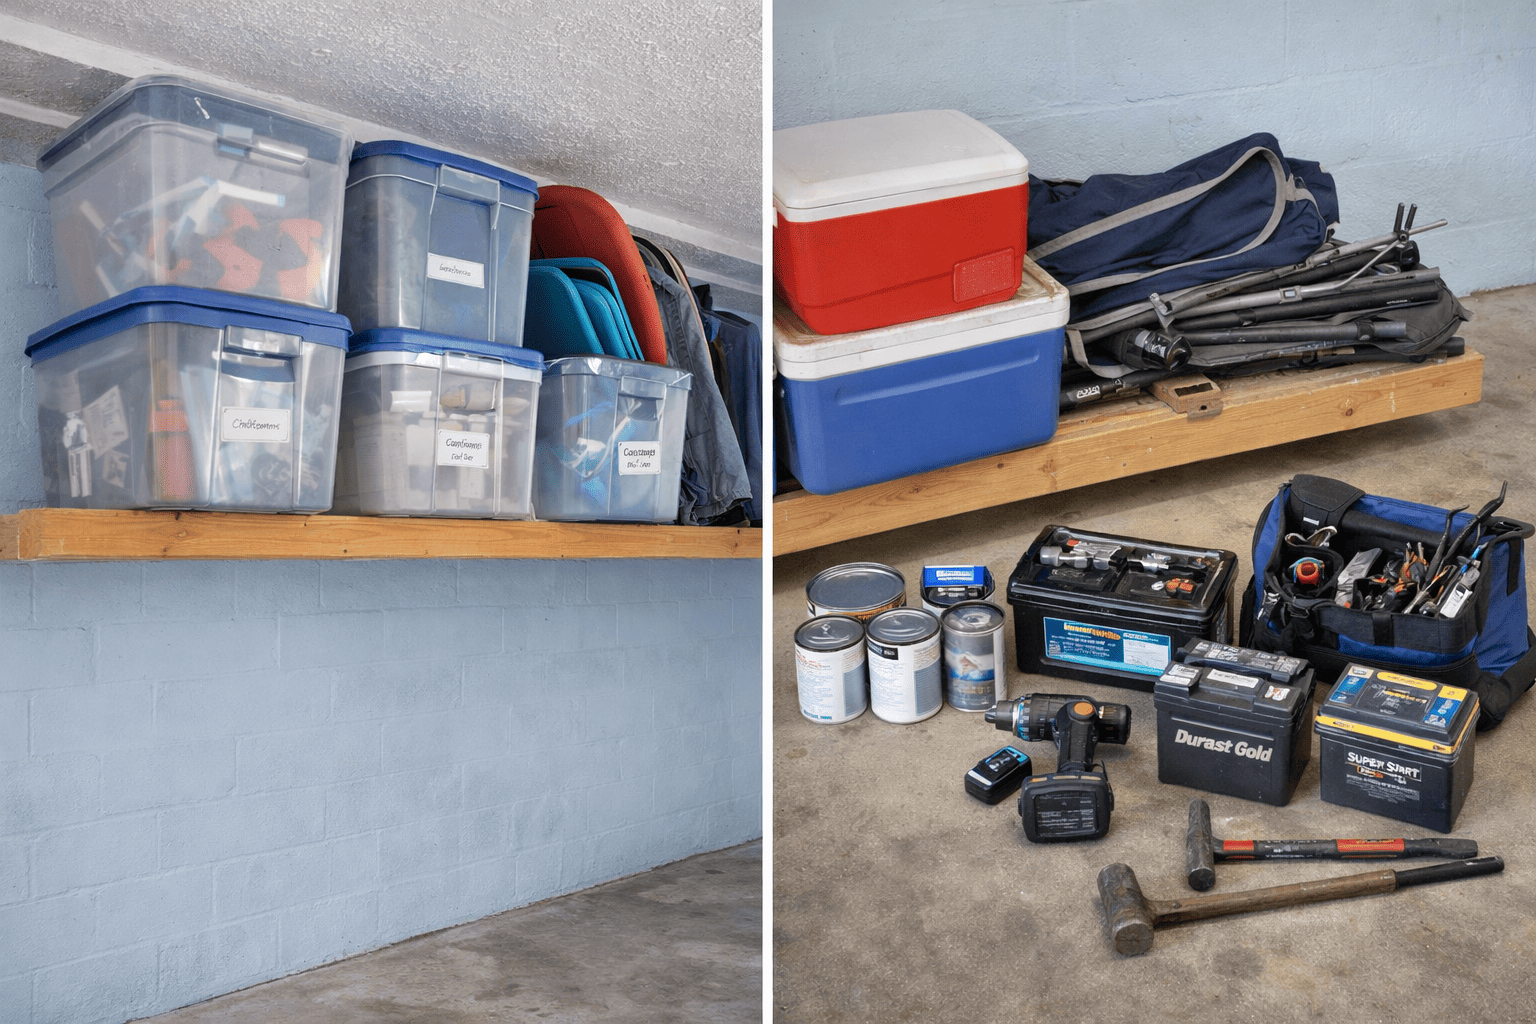
What to keep out of overhead storage:
- Paint, stain, and caulk (heat ruins them fast)
- Electronics, batteries, or anything with a circuit board
- Heavy tools or anything over 30 lbs, unless your structure is specifically rated for it
- Anything you need to grab fast and often (that is a wall hook situation, not an overhead bin situation)
How High Should Overhead Garage Storage Be?
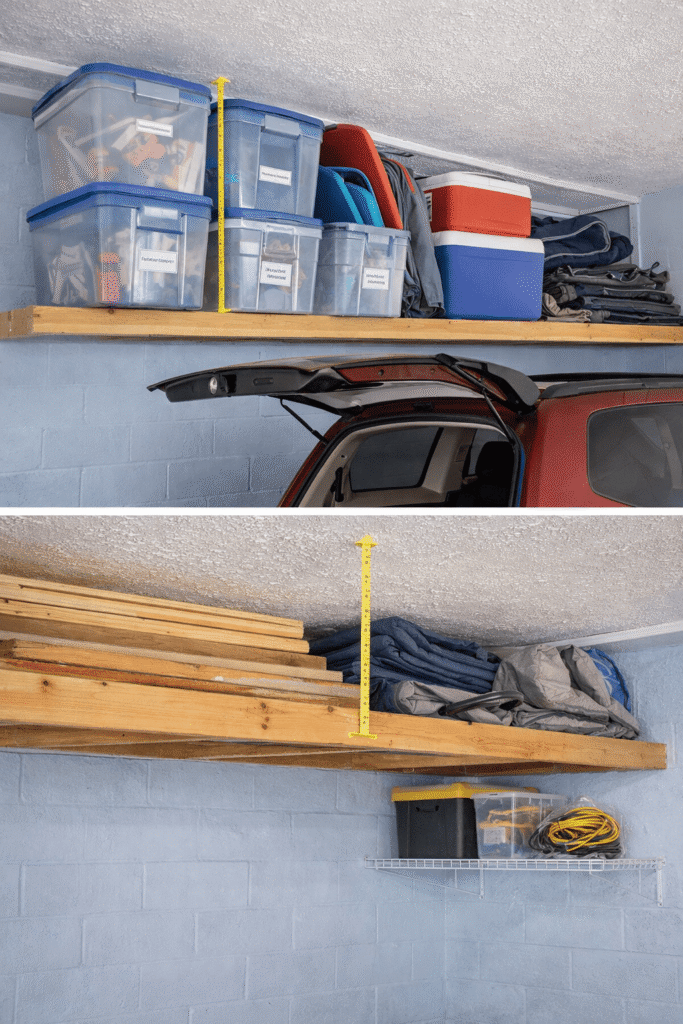
The minimum clearance for overhead storage is about 7 feet from the floor, so you are not walking into bins with your head.
The ideal range is 8 to 9 feet. If you park cars underneath, allow at least 6 inches of clearance above the roof of the tallest vehicle.
My uncle drives an SUV, so we kept everything a solid foot above it just to be safe and so she could open the hatchback without thinking about it.
Low-ceiling garages around 7 feet are trickier.
You can still use overhead space, but you are limited to very flat items like lumber, folded tarps, or thin seasonal items rather than full bins.
In those cases, wall storage and floor-level shelving often do more work.
The Easiest DIY Overhead Garage Storage for Bins (Under $30)
This is the one we built for my aunt. It is just two 2×4 boards running parallel between ceiling joists, spaced so that standard plastic storage bins rest on top with the handles hanging over the edge.
The bins sit in the frame. You can slide them in and out without tools.
What you need:
- Two 2x4x8 boards (around $5 to $7 each at a home improvement store)
- Joist hanger screws or 3-inch structural screws (a box runs about $6 to $8)
- A drill, a stud finder, and a level
- A helper (seriously, do not try to hold boards overhead and drill at the same time)
Basic steps:
- Find your ceiling joists with the stud finder and mark them.
- Hold one 2×4 flat against the bottom of two joists, level it, and screw it in. Repeat for the second board, spaced about 16 inches apart (enough for a standard bin to rest on both rails without falling through).
- Load your bins and check that they sit stably before walking away.
- Label the front face of each bin before it goes up. Once it is overhead, you will not remember what is in it.
Joists are typically spaced every 16 or 24 inches.
You want to anchor into at least two joists per board for safety; do not anchor into drywall alone.
The weight will pull it out over time.
When a Store-Bought Ceiling Rack Makes More Sense
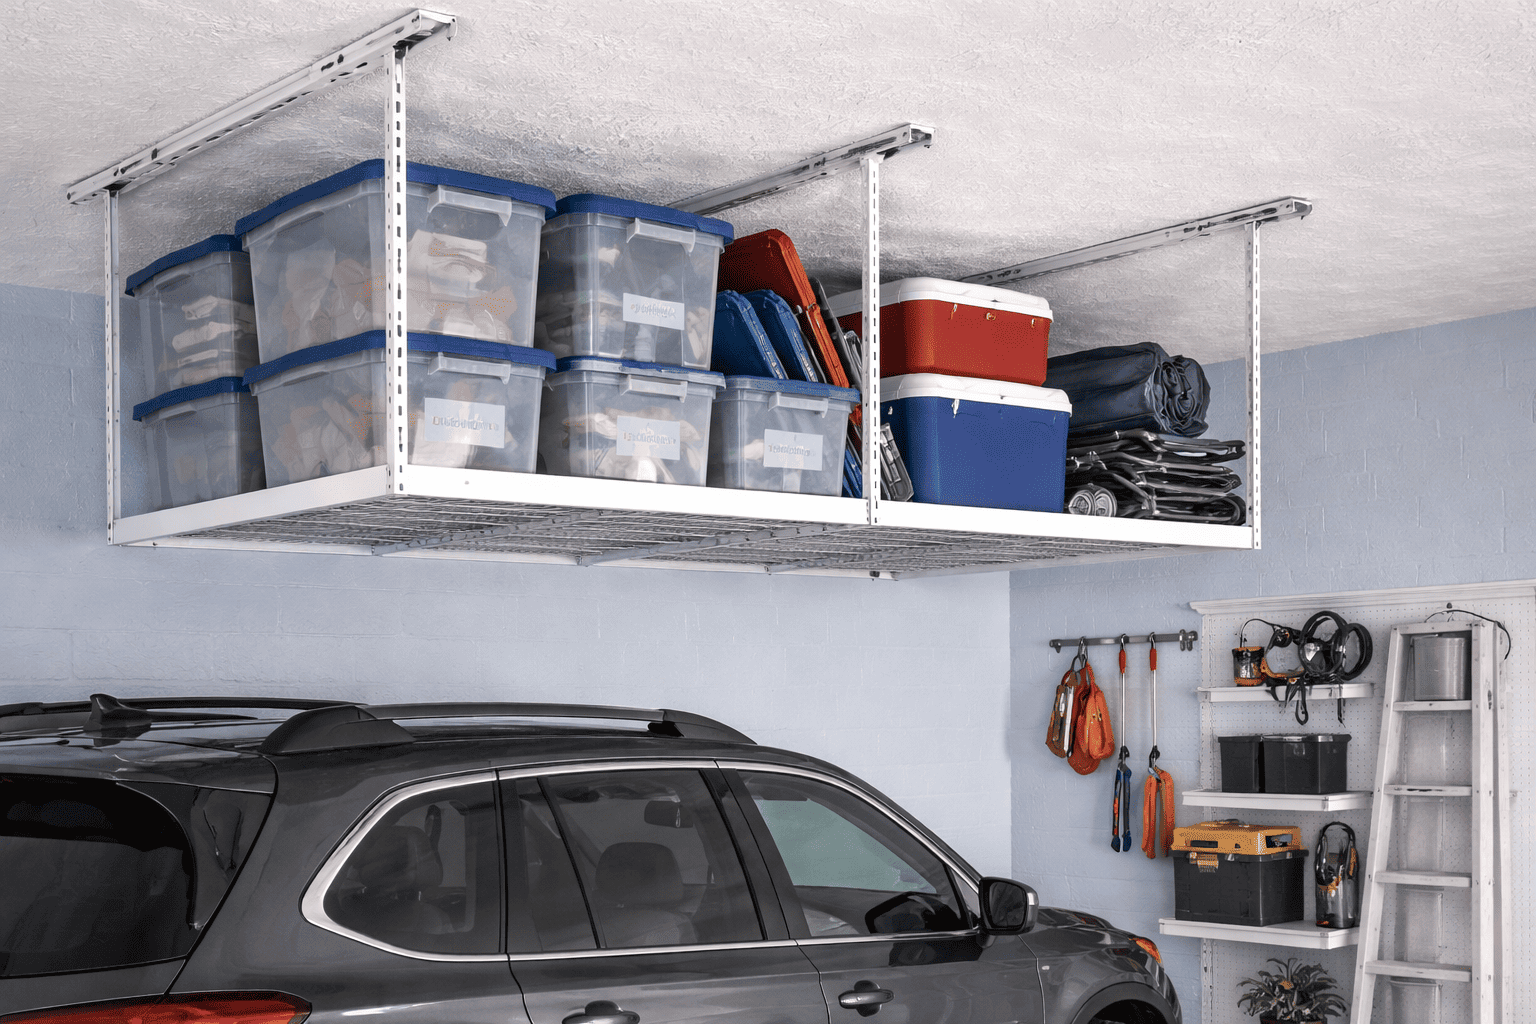
If you do not want to build anything at all, a ceiling-mounted storage rack is a reasonable option.
These typically run between $50 and $150, depending on size, and they come with all the hardware and instructions.
They mount to the ceiling joists the same way a DIY build would, just with pre-cut metal instead of wood.
The main advantage over a DIY bin rack is that they have adjustable height rods, so you can lower or raise the platform depending on what you park underneath.
They also typically have a weight rating printed on the box, which is reassuring.
My honest take: if you have a low ceiling or an unusual joist layout, the adjustable height rods on a store-bought rack actually give you more flexibility than a rigid wood build.
If your ceiling is standard height and your joists are in good shape, the DIY version saves you money and does the same job.
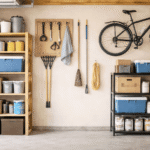
Cheap Wall Storage Ideas That Handle the Everyday Stuff

Overhead is for seasonal and rarely-used things; the wall is for what you actually reach for.
Keeping these two zones separate is what makes the system work. Once you mix them up, it all turns into clutter again.
Ideas that are cheap and actually useful:
- Pegboard: A 4×8 sheet of pegboard is under $30 at most home improvement stores, and a bag of hooks is another $10. It gives you a completely flexible wall system you can rearrange as your needs change. It works well for hand tools, extension cords, garden gloves, spray bottles, and anything else you use regularly.
- Utility hooks screwed directly into studs: These run about $3 to $8 each and can hold bikes, ladders, brooms, shovels, and hoses. Find the stud, pre-drill a small pilot hole, and screw it in. Done in five minutes.
- Wall-mounted metal shelving brackets with plywood or pine boards: A pair of heavy-duty angle brackets plus a pine board gives you a sturdy shelf for under $20. Good for smaller bins, spray cans, and gear you want visible and reachable.
- Repurposed wire shelving from inside the house: If you are upgrading shelves elsewhere, the old wire shelving can go in the garage. A set of wall clips and a few anchors, and it mounts to drywall fine for lighter items.
Safety Basics for DIY Overhead Storage (Especially if You Have Kids Around)
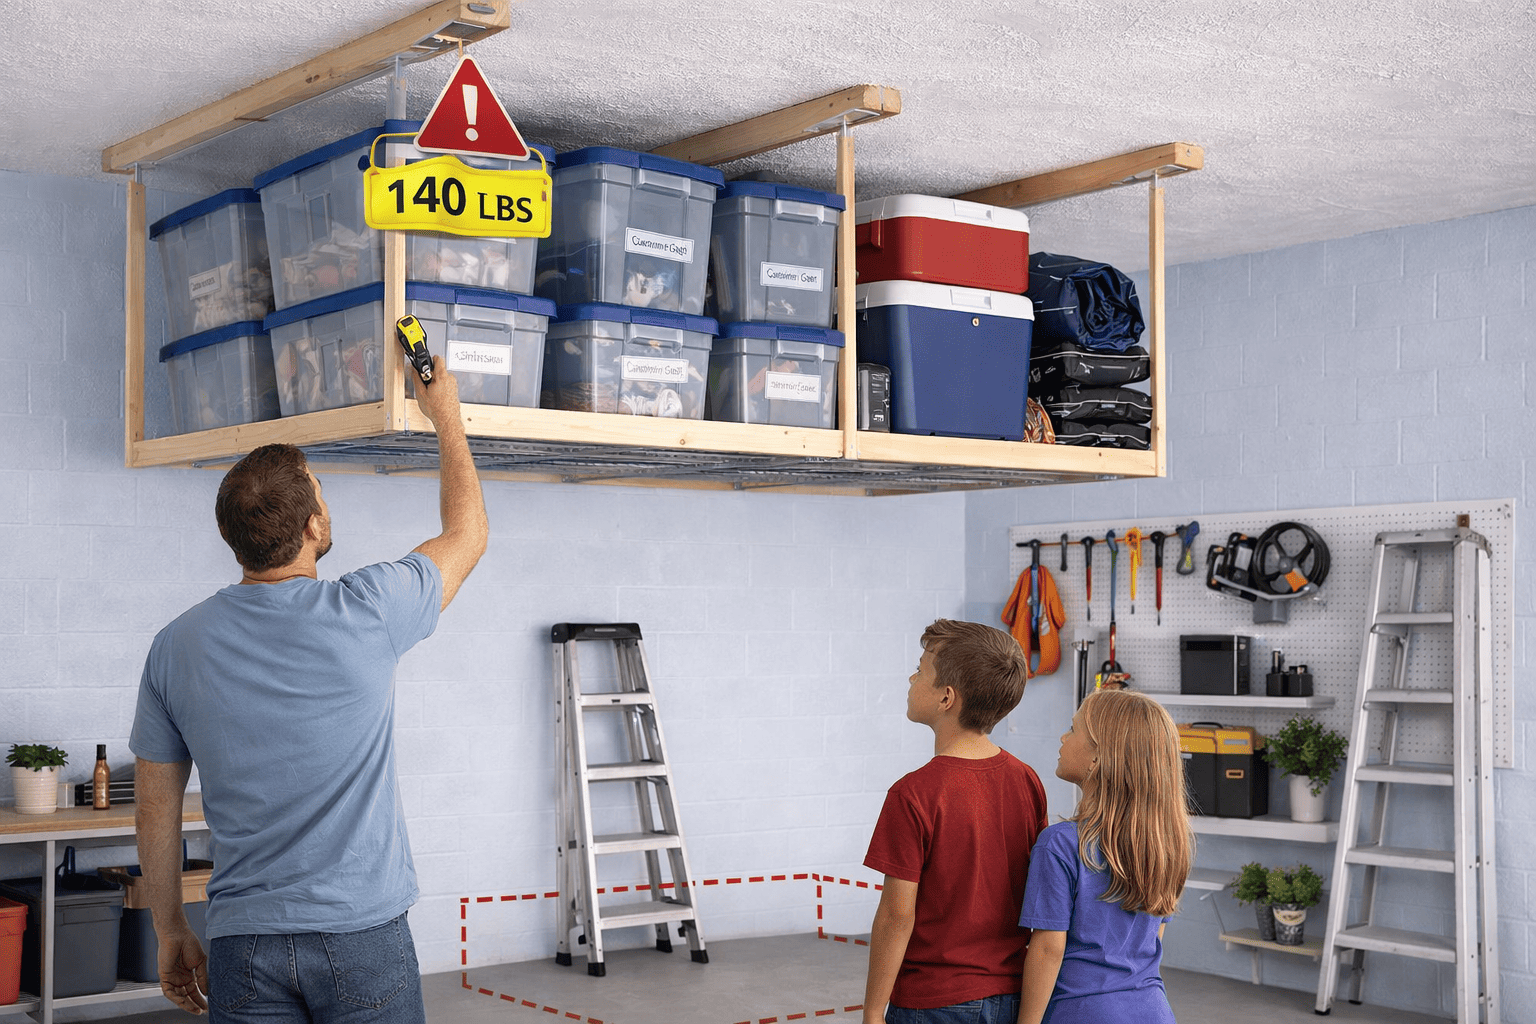
My aunt has kids. So when we built her overhead bin rack, we thought about this. Here is what actually matters:
- Always anchor into structural ceiling joists, not just drywall or plywood sheeting. Use a stud finder to be sure. Drywall anchors are not rated for overhead weight loads and can fail without warning.
- Know the weight limit before you load it. A simple 2×4 bin rack anchored to two joists can typically hold 100 to 150 lbs spread across both boards. That is plenty for bins of holiday decor. It is not enough for a pile of concrete blocks.
- Test at half load first. Put a few items up, wait a day, check the screws and boards for any movement. Add the rest once you are confident in the structure.
- Keep a clear path below the overhead storage zone. If a bin slid out, you want it to land on clear floor space, not on a car or a child. We keep nothing directly below the rack that cannot handle a falling bin.
On the ladder question: most people do not have a fixed ladder in their garage, so getting up to overhead storage means dragging out a step ladder every time.
That is not as inconvenient as it sounds for truly seasonal items, but it does mean overhead storage is the wrong spot for anything you want weekly access to.
If You Rent or Cannot Make Permanent Changes
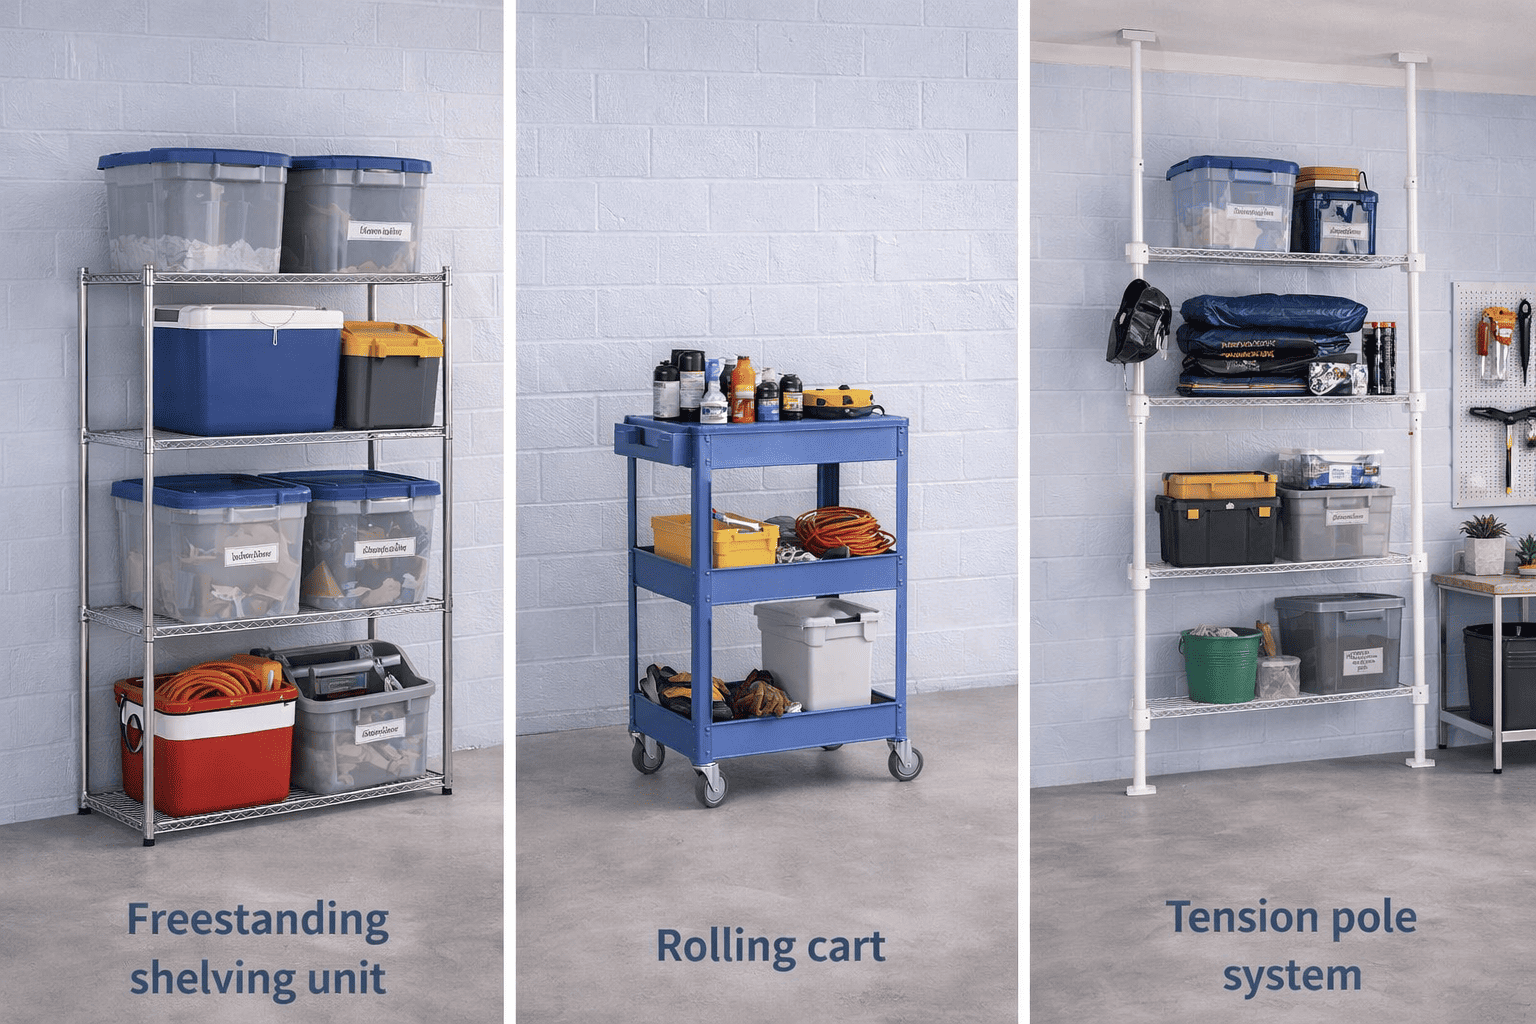
Not everyone can screw into joists. If you are renting or sharing a space where permanent modifications are off the table, overhead storage gets harder but not impossible.
- Freestanding shelving units: A metal utility shelf from a hardware store runs $40 to $80 and goes up without a single screw in the wall. It is not ceiling storage, but it stacks gear vertically and keeps the floor clear. Good option for small garages where vertical floor space is the real asset.
- Rolling carts and utility caddies: A basic rolling tool cart or a three-tier rolling cart can be pushed against the wall and hold a surprising amount. Good for renters who want organization they can take with them when they leave.
- Tension-mounted pole systems: These grip between the floor and ceiling without drilling. They will not hold nearly as much weight as anchored shelving, but they work fine for lighter items. Not ideal for garages with low ceilings or sloped rooflines.
Small Details That Make the System Actually Stick
The build is only half the job. The other half is keeping it from turning back into a pile. A few small things help with that.
- Label every bin before it goes overhead, on the side facing out. Write the category on a piece of tape with a marker. It does not have to be pretty. It just has to be readable from below.
- Use identical bins if you can. They stack better, fit on overhead racks more predictably, and it is easier to know which bin to grab. The large Sterilite or Rubbermaid bins at big box stores are consistent in size and relatively inexpensive.
- Do not overfill bins that are going overhead. Heavy bins are harder to lift down safely and put more stress on the rack. A bin with a lid that barely closes is too full for overhead.
- Leave one empty bin in the garage at floor level. It becomes the natural landing spot for things that need to be sorted later rather than just tossed onto the floor or shoved in a corner.
Wrapping It Up
My aunt’s garage is not perfect now. There is still a folding table set up on the second car’s side that does not technically belong there, and they keep changing stuff.
But the ceiling above it holds six labeled bins of holiday and seasonal stuff that used to live on the floor and along the walls.
She can park her SUV on one side, walk through comfortably, and actually find things when she needs them.
The project cost under $40 and took most of a Saturday.
That is what an inexpensive garage organization actually looks like. Not a total overhaul with $500 in cabinetry.
Just a system that uses the space you already have and gets the clutter off the floor.
People Ask About Garage Storage on a Budget
What is the cheapest way to get overhead garage storage?
Two 2×4 boards and a box of structural screws. That is it.
If you have a drill, the whole thing costs under $20, and you can build it in about two hours.
The boards mount flat to the ceiling joists, and standard plastic bins rest on top. It is not fancy, but it works.
What if my garage ceiling is only 7 feet?
Overhead bins are going to be tight at 7 feet, especially if you park underneath.
You can still use that ceiling space for flat items like lumber, folded outdoor furniture, or seasonal mats, just not deep bins.
In a low-ceiling garage, wall storage and vertical floor shelving will do more for you.
Can I do any of this if I only have a drill and no other power tools?
Yes. The bin rack only needs a drill. A lot of home improvement stores will cut lumber to length for free or a small fee if you give them measurements.
So you do not even need a saw. Pick up pre-cut 2x4s, a box of screws, and a drill to get the whole job done.
How do I keep my garage organized once I set it up?
The label is the most important thing. If every bin is labeled and every hook has an obvious purpose, stuff tends to go back where it came from.
The system fails when things do not have a clear home and end up on the floor because that is easier.
Give every category a spot, and it mostly manages itself.
Abraham is the creator of Mountain Bike Insider. He is a writer and researcher who enjoys mountain biking, working on DIY projects, organizing spaces, and testing ideas in real life. He focuses on clear and honest explanations based on experience and research, without pretending to be a professional expert.