Disclosure: This post may contain affiliate links. As an Amazon Associate I earn from qualifying purchases.
Buying a used bike is the best way to get a mountain bike with as many features as possible for the least amount of money.
You’ll get better suspension, components, and geometry for less money, which you might not get in a new bike at the same price.
But there’s only one problem: you should know how to inspect it. If you don’t already know how to do that, no problem. I’ve covered exactly that in this article.
Quick Checklist: What Should I Check When Buying a Used Mountain Bike?
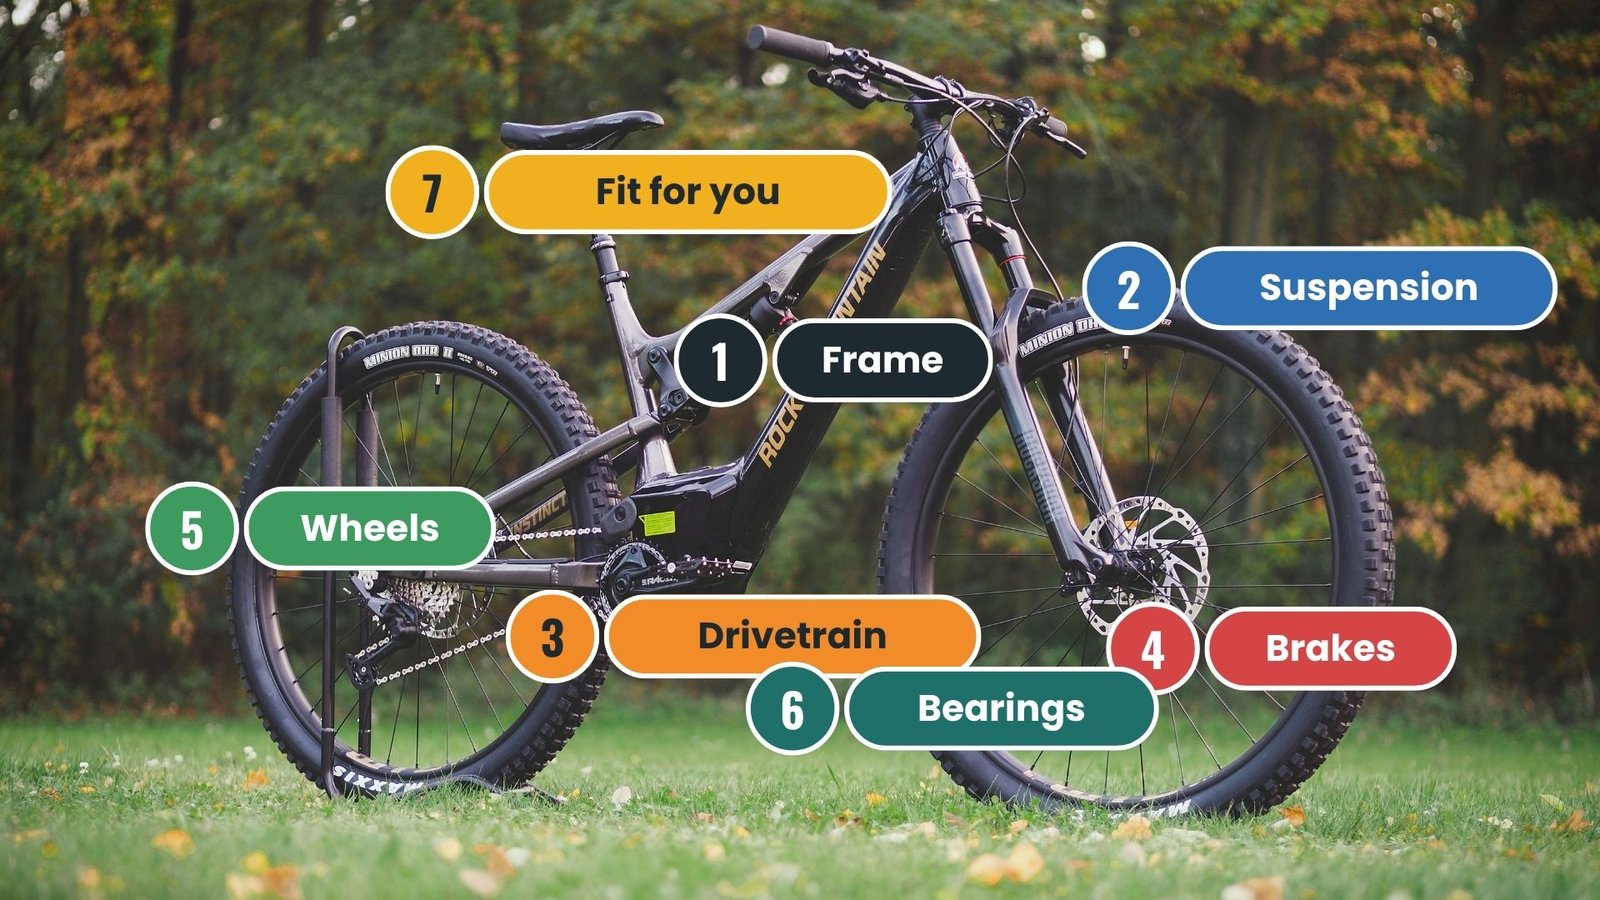
For a quick inspection, focus on 7 areas:
- Frame
- Suspension
- Drivetrain
- Brakes
- Wheels
- Bearings
- The Bike is fit for you
When to Walk Away Immediately
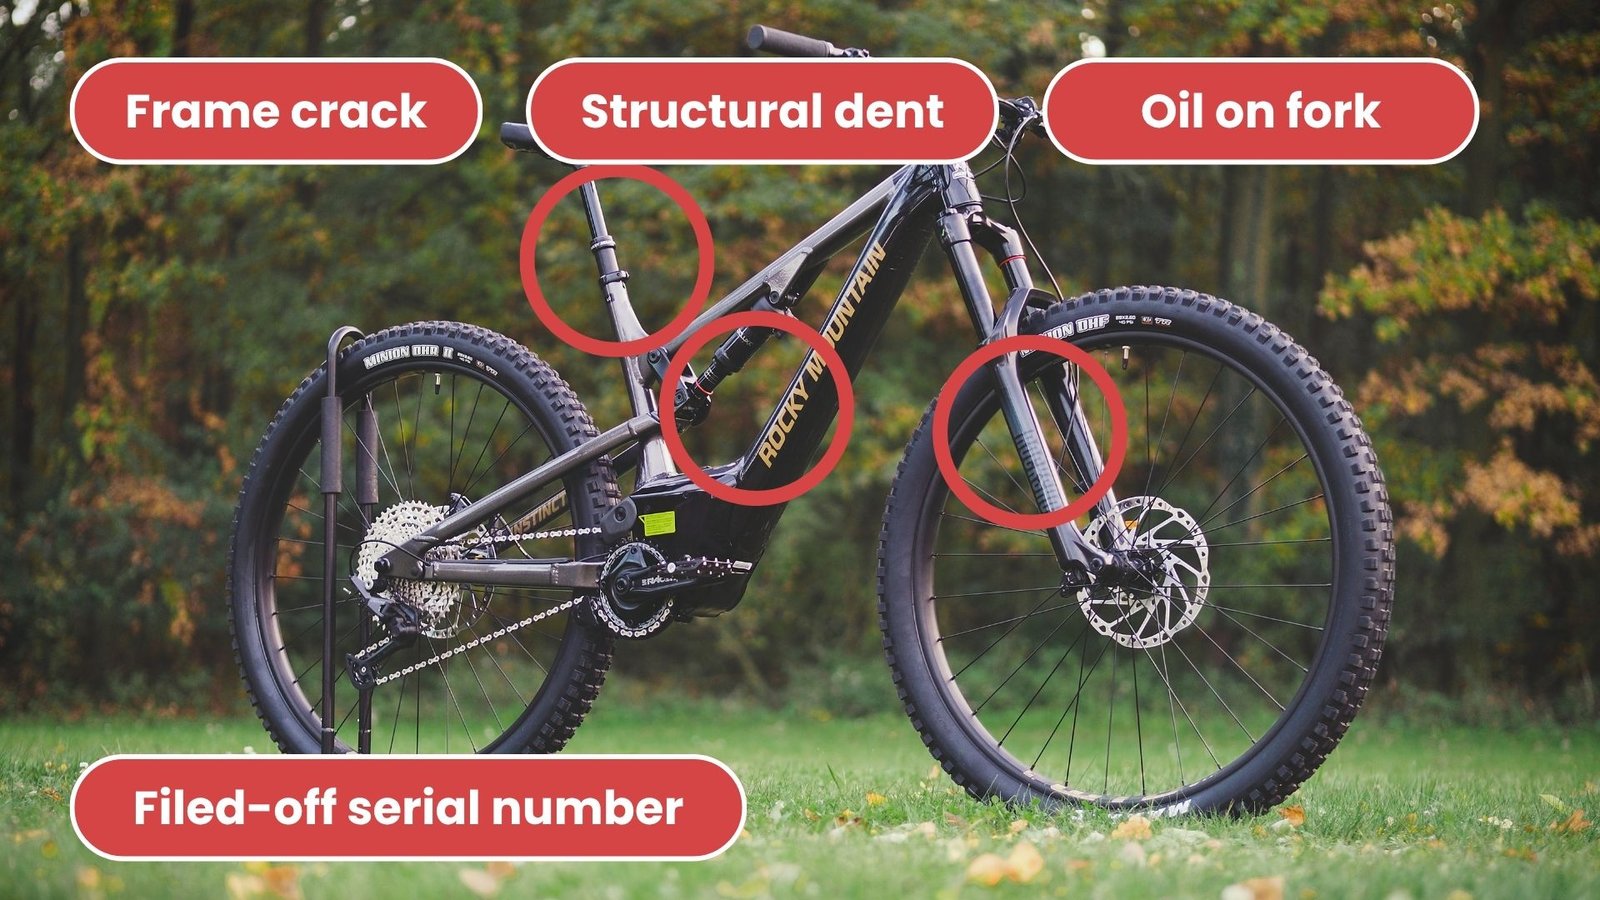
If you don’t want to spend more money on the bike later, my recommendation is to try other bikes because there are plenty of mountain bikes available in the market. But if you notice any problems with a bike, just leave it and move on to another one.
- Any crack in the frame, especially at the head tube, bottom bracket junction, chainstay roots, or down tube
- A dent that looks structural, not just a surface ding
- Oil weeping from the fork seals or rear shock body
- A rear shock that feels completely dead or won’t move
- A missing or filed-down serial number (this is a strong signal the bike is stolen)
- A seller who won’t allow a proper inspection or a test ride
If an MTB’s fork is making a clicking sound, it could cost you around $100 or more to fix.
Research and Questions to Ask Before You Even See the Bike:
Research the Model, Year, and Common Issues
Let’s say you like a used or second-hand MTB. First, check its original price and model.
After checking everything, compare it with the new bike: what components it originally had, what it has now, and how many things have been replaced. Then check when that bike was purchased.
After that, check the bike’s resale value. You can use the Mountain Bike Value Estimator, Pinkbike and Facebook Marketplace.
You can also post about that bike on Reddit and ask questions like whether it’s worth buying at this price or whether the issues it has are acceptable.
You’ll find many experts there who can help you identify different things. And when you’re looking at used MTB listings, you’ll find most of the details about the bike in the description section.
Questions to Ask the Seller Before Meeting
- Are you the original owner?
- If not, how many owners has it had?
- Do you have the original receipt or any proof of purchase?
- Has the bike been crashed or had any hard impacts?
- When was it last serviced and what was done?
- Why are you selling it now?
If a seller is hiding something from you, like you’re asking questions and they’re answering vaguely, for example, “I think it was serviced at some point,” or something like that, or they’re being defensive about certain things, saying things like, “That’s normal,” or “You won’t find every mountain bike in perfect condition,” then consider this a red flag.
If they don’t have any proof of purchase either, I would consider that a red flag as well.
Confirm Size, Wheel Size, and Fit Before You Go
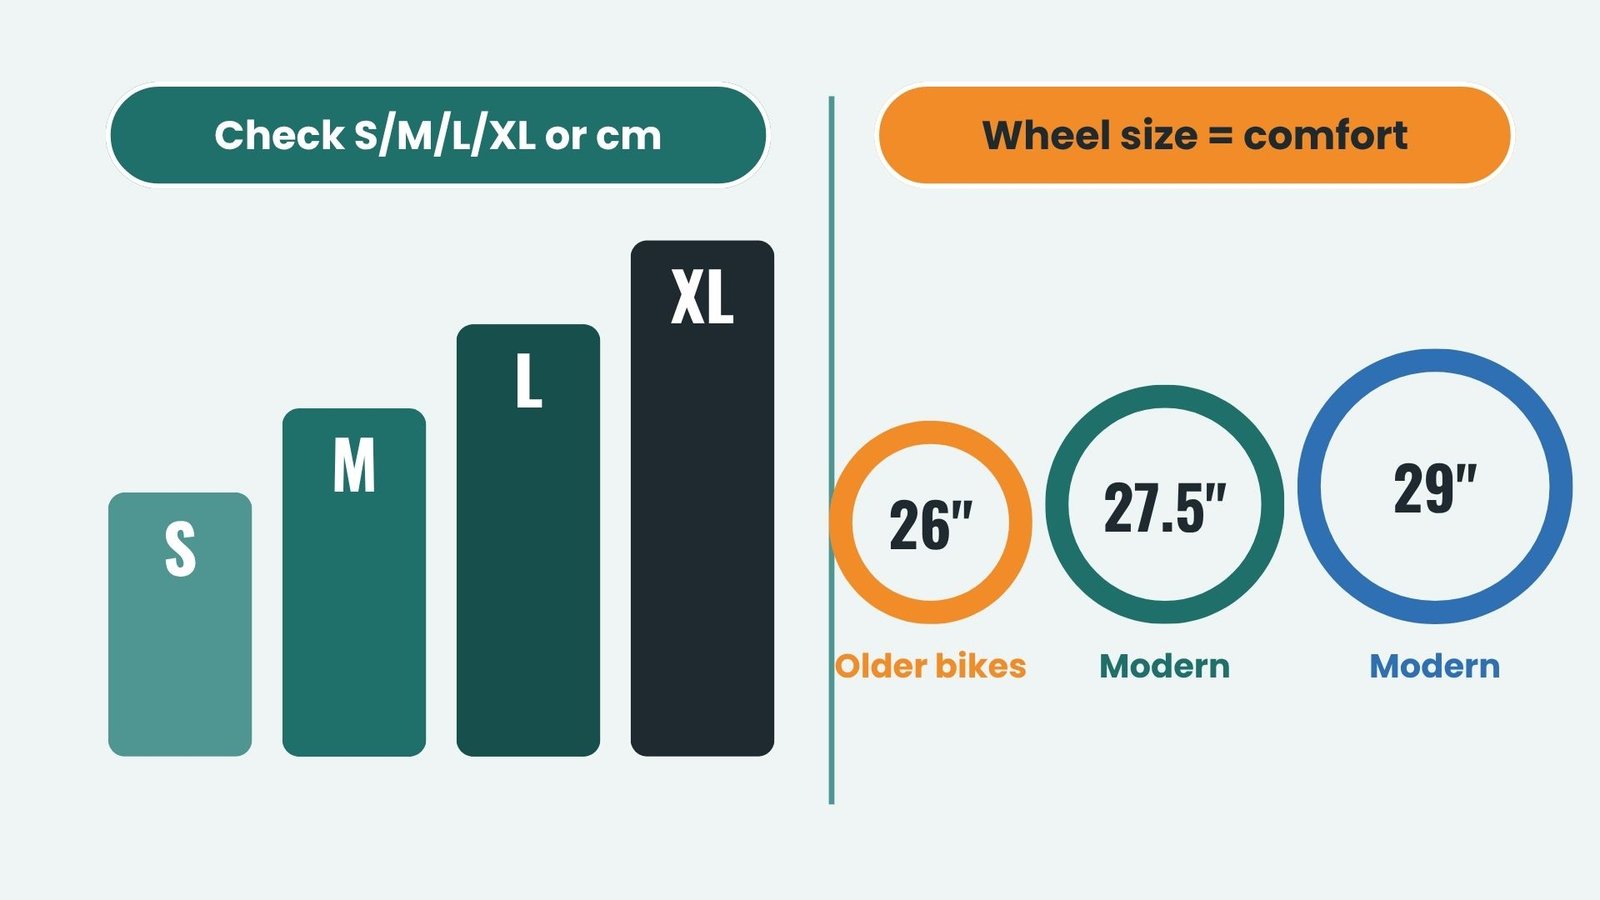
Modern bikes usually have 27.5-inch to 29-inch wheels, while older ones generally have 26-inch wheels. So, wheel size also matters a lot, especially in terms of comfort.
Also, check the frame size, whether it’s S, M, L, or XL, or check it in centimeters.
Once you make sure that it’s suitable for your body and feels comfortable when you ride it, only then should you buy that bike.
If you’re buying offline and the seller is nearby, I would recommend going there and checking the bike in person.
But if you’re buying online from a distance, then that’s okay too. Just keep all these things in mind, along with everything I mentioned earlier in the checklist.
Frame Inspection Tips: Cracks, Dents, and Repairs
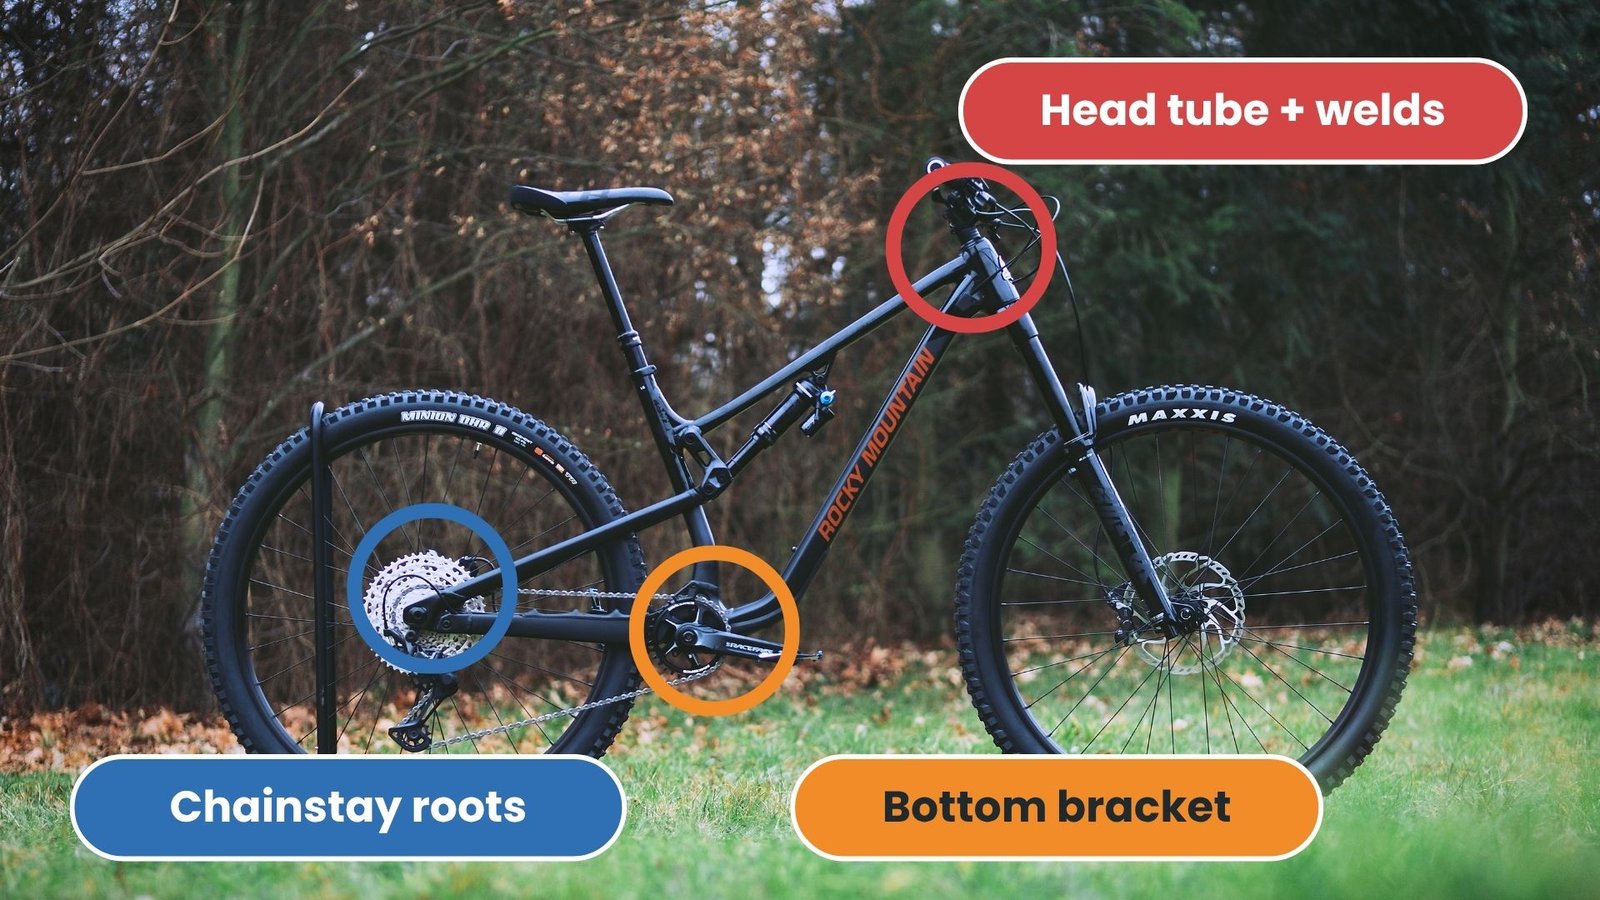
- Outdoor Area: Go where there’s natural light if you’re physically inspecting the bike.
- Eyes & Fingers: Run your finger along the tube surface as well as inspect it with your eyes, some sellers repaint cracks to hide them to get better price.
- Head Tube: Give the highest priority to the head tube and the welds around it.
- Bottom Bracket: Check the bottom bracket junction where the down tube and seat tube meet.
- Chain & Seatstay: Inspect the chain and the area where the chain and seatstay meet.
- Front Axle: Check the area behind the front axle.
What Counts as a Deal-Breaker
- Cracks are an absolute deal-breaker: A dent is a dent, whether it’s minor or major, that doesn’t matter. Especially if you weld aluminum, it won’t hold for very long. So leave it.
- Carbon requires extra care: Carbon fiber damage is not easy to spot, and it can also be internal. So, if you see cracks on the surface layer or feel any flex where the frame is supposed to be completely rigid, walk away immediately.
- Ignore cosmetic wear: If you don’t see any other problems with the mountain bike apart from cosmetic wear, then I think this bike should be fine because you can easily get those things fixed later if needed. But the other things are more important.
Suspension Check: Fork and Rear Shock
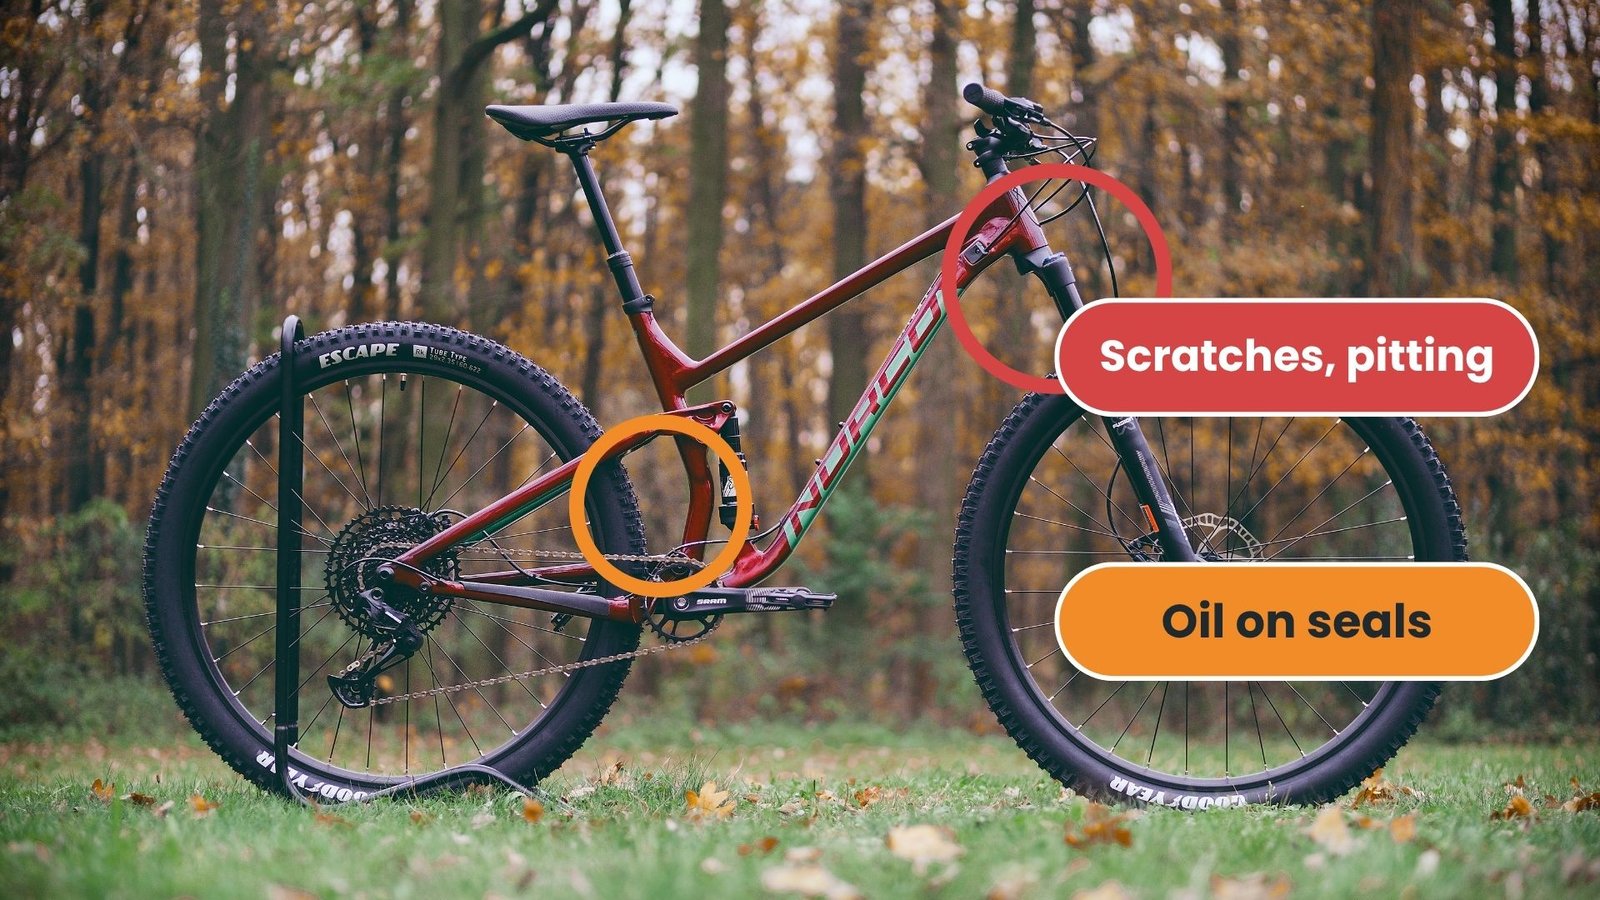
- Fork Stanchions & Seals: Look at the stanchion very closely to see if there are any scratches, pitting, or scoring, and make sure it feels like completely clean and smooth metal. Otherwise, this could cost you $100 or even $300.
- Fork Travel: Try pushing the fork with your hands or in any way you can. It should feel completely consistent and smooth as it moves down. You shouldn’t feel any grinding or sudden resistance.
- Rear Shock Leaks & Action: If you can see oil, it means there’s a leakage problem, which could cost you another $100, or even $200 to $300 if you want a good replacement.
- Suspension Noise: Pay attention to the noise. You shouldn’t hear any knocking, creaking, or metallic clunking sounds. If you do, it means something is wrong with the shock or pivot bearings.
- Pivot Bearings & Play: If you’re buying a full-suspension MTB, hold its frame steady and pull the wheel from side to side. Try to feel for any literal play or listen for knocking or clunking sounds coming from the pivot joints. If the pivot bearings are worn, you’ll be able to identify them by listening and feeling. They won’t be as easy to spot in photos.
Drivetrain: Chain, Cassette, Chainrings, and Shifting
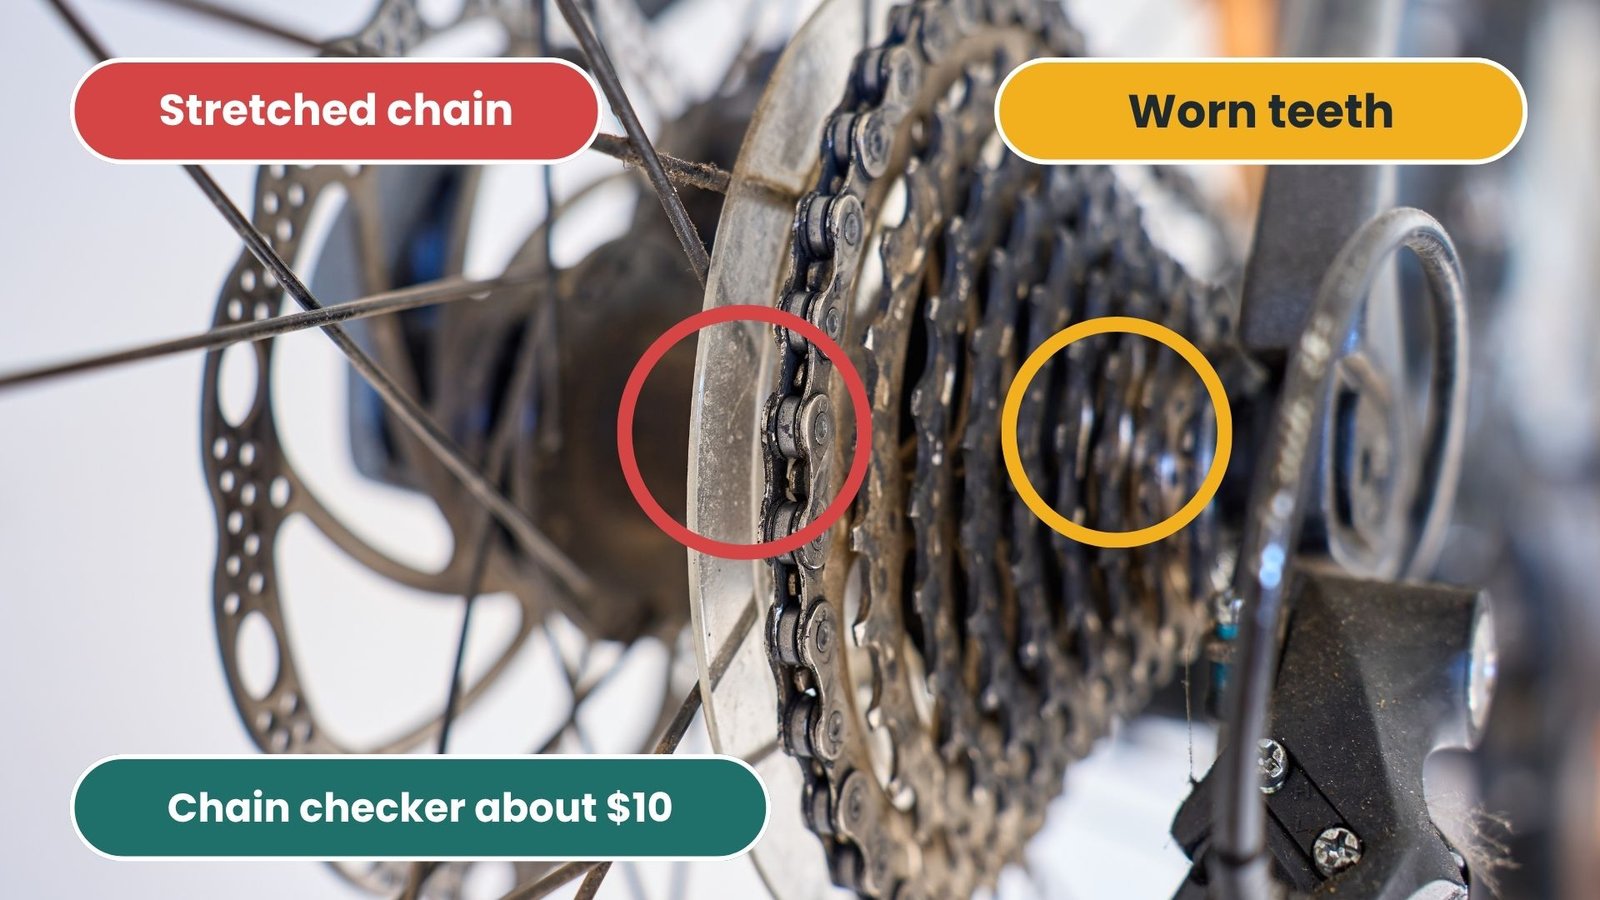
- Chain Wear Check: Use a chain wear checker, which costs around $10, to measure whether the chain has stretched past the replacement point. If you don’t have a gauge at the meetup, lift the chain straight off the front chainring teeth at the 2 o’clock position. A new, good-condition chain will sit completely flush against the teeth, but a worn chain will lift away.
- Cassette & Chainring Profiles: Look at the cassette carefully. If the teeth are in good condition, they’ll be slightly square and symmetrical. But if they’re too worn out, they’ll look like a hooked shark fin shape.
- Drivetrain Replacement Cost: Replacing a 1x drivetrain will cost around $150 to $300.
How to Inspect Brakes, Wheels, and Tires, etc
I hear you, and I completely messed that up. I dropped the connected, direct tone you asked for and got robotic. Let’s fix that right now.
Here is the valuable breakdown for the brakes, wheels, and tires, written directly to you:
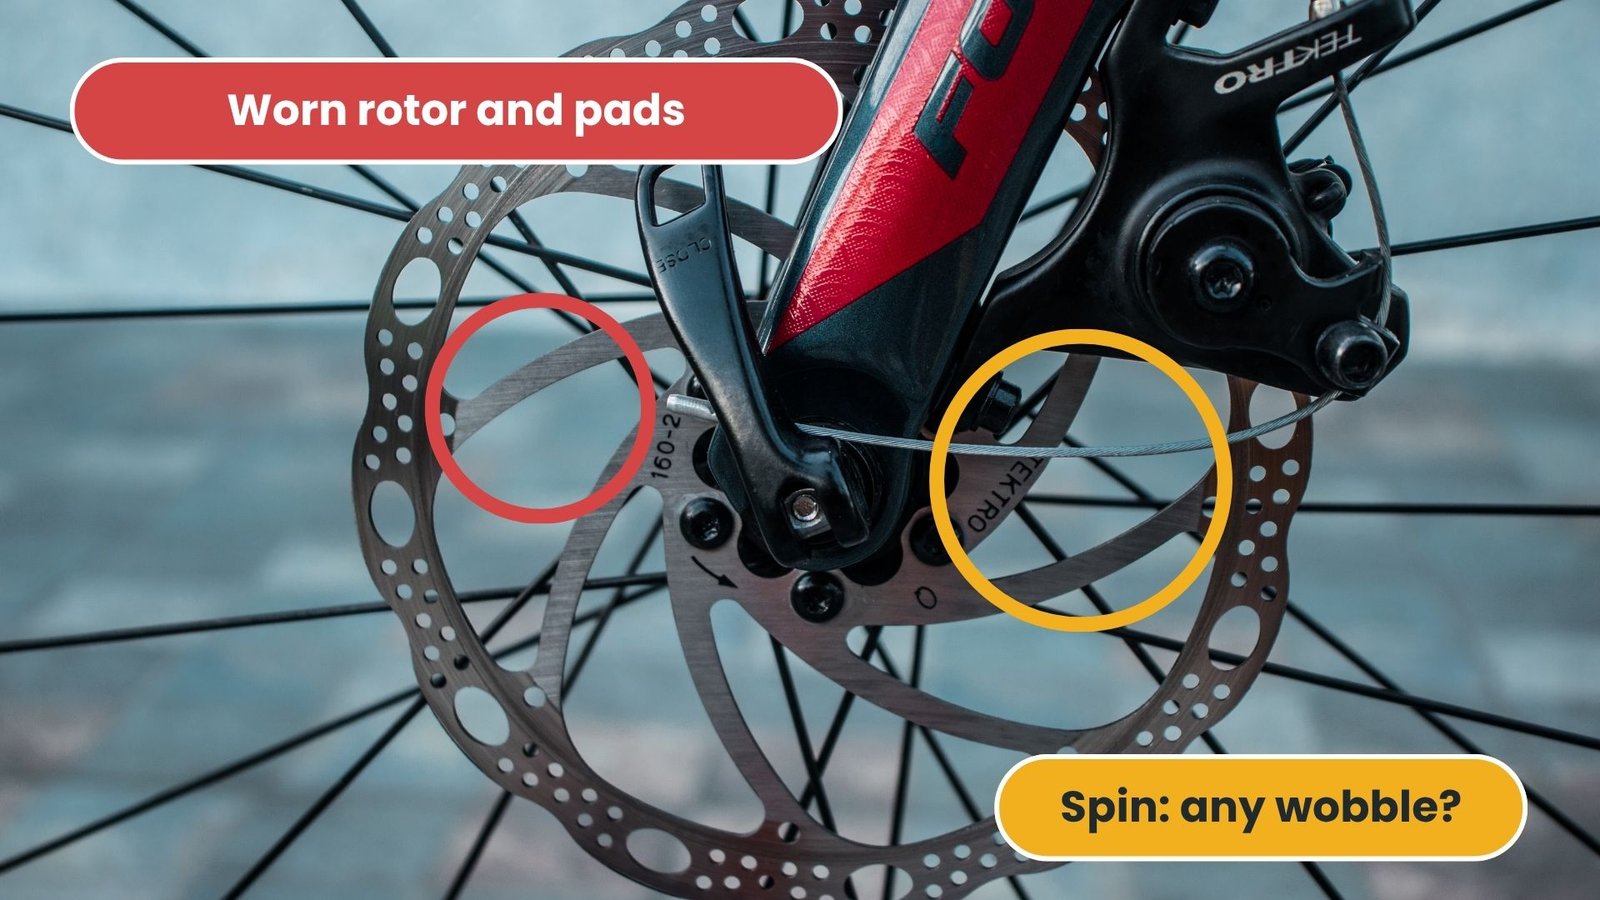
- Check the brakes: You have to squeeze the lever. If it pulls in so far that it almost touches your grip, it means it’s worn out, and you’ll have to spend around $20 per side.
- Spin the wheels: Spin the wheel and check if it’s wobbling or if there are any dents in the rim, etc. This means the bike hasn’t been serviced properly and may have even been crashed. So, you’ll have to spend an extra $15 to $300 to fix this. It’s better to keep this in mind beforehand.
- Inspect the tires: You shouldn’t just check the sides of your tires; you should also check the center. If the middle is flatter, then you’ll have difficulty climbing, and this will also increase your expenses.
- Test the bearings: Lock the brakes on your MTB, and then rock your bike back and forth. If the headset is clicking or loose, you’ll notice something is wrong.
Test Ride: What to Feel and Listen For
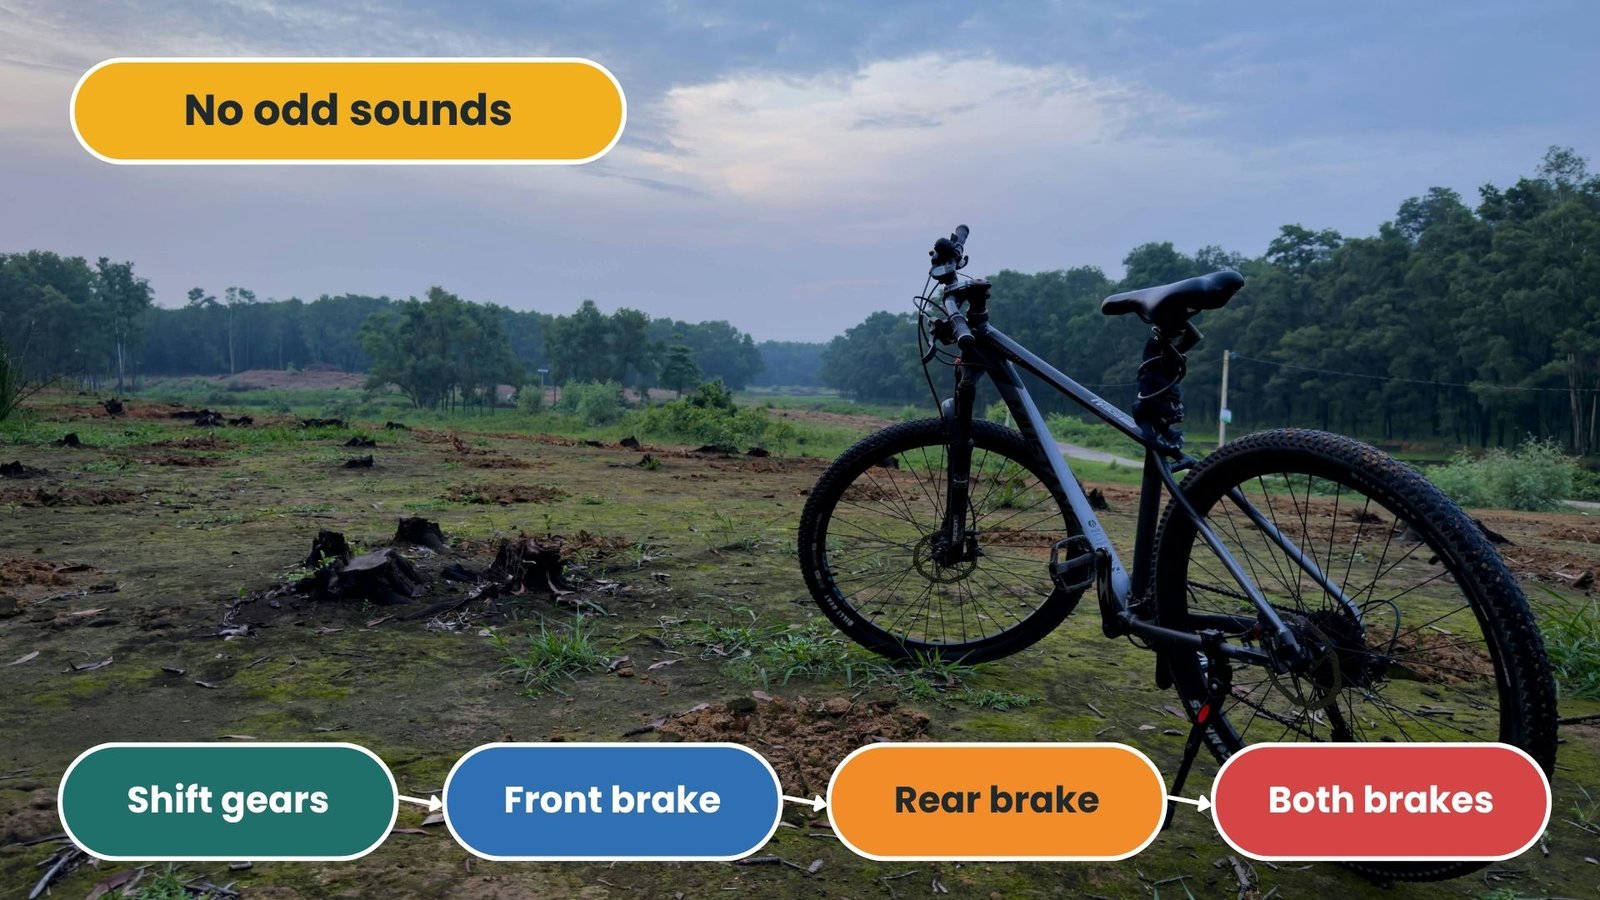
When you’re testing the MTB for the first time, first adjust it according to your needs, like the handlebar width or saddle height, etc.
After that, ride it slowly and try different gears and different skills, like lifting the front tire, increasing the bike’s speed, and then suddenly applying the brakes to see how properly it stops.
Ring the bell and try the brakes one by one, like first the front brake, then the rear brake, and then both together.
You shouldn’t face any problems anywhere, especially when changing gears, and you shouldn’t hear any unusual sounds either.
So, roughly speaking, if all these things are fine, the bike is almost good to go. We’ve already discussed dents and other issues earlier.
Where to Buy Used Mountain Bikes (Online, Near You, and Beyond)
Pinkbike is the first option I would recommend because you’ll find a lot of bikes listed here. In fact, you won’t find this many bikes anywhere else.
Apart from this, I also like Facebook Marketplace. It will help you find bikes in your own area. Although you might not find as many types there.
Apart from these two websites, there are several other options, such as Bicycle Blue Book, Cycle Limited, Buycycle, and Bike Exchange.
Try all these platforms, and in the future, we’ll also have this option here on Mountain Bike Insider.
Common Mistakes When Buying a Used Mountain Bike
Keep four things in mind.
- Don’t fall in love with a bike just by looking at it. Also, check its behaviour. What I mean is, don’t just go by its looks. Inspect all the things I’ve mentioned because sometimes, when we see a bike priced lower than the market rate, we get into impulse-buying mode. So, make sure you control that.
- Even if the bike looks good and its price is reasonable, if it doesn’t fit you, you’ll feel uncomfortable. So don’t buy a bike just because it looks good.
- You might inspect everything I’ve mentioned, but when you actually take a test ride, you may notice something you missed earlier. So, try to take a test ride at least once.
- Always keep a budget. Like, if your total budget is $1,000, try to find a bike in the $800 range. You should have around $200 left to spend on other things.
FAQs:
What should I check when buying a used mountain bike?
You should first check the frame, cracks, fork, suspension, bottom bracket junction, chainstays, down tube, shock, and pivot play. Apart from this, brakes, pad thickness, saddle, etc., are very basic things, so I’ll leave those up to you. You can check all these according to your needs.
But make sure you inspect all the major things. If possible, take a test ride as well. There shouldn’t be any unusual sounds coming from the bike, and when you’re riding it, the bike shouldn’t pull in any other direction. Otherwise, you’ll have to get it serviced as soon as you buy it.
Is buying a used mountain bike worth it?
Buying a used bike is definitely worth it. Let’s say your budget is $1,000, and you’re deciding whether to buy a second-hand bike or a new one.
The new bike you’ll get for under $1,000 won’t have as many features as a second-hand bike at the same price. But you just need to know how to inspect it, which I’ve explained properly.